Adding Floppy Disk Drive
You can add an existing floppy disk image, a new one or a real floppy disk to your virtual machine.
To add a floppy disk to the virtual machine:
- Start Parallels Management Console.
-
Open
the
Virtual Machine Configuration
dialog
and launch Add Hardware Wizard by clicking the
Add
button
 in the bottom part of the dialog.
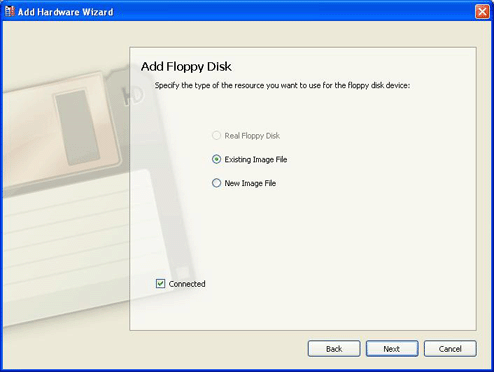
- In the Select Device window, select Floppy Disk and click Next .
-
In the
Add Floppy Disk
window, select the resource for the new floppy disk and click
Next
. The following resources can be used:
- Real Floppy Disk . The wizard will use a real disk to emulate a floppy disk.
- Existing Image File . The wizard will find and use an existing image file to emulate a floppy disk.
- New Image File . The wizard will create a new image to emulate a floppy disk.

If you want the device to be connected to the virtual machine automatically at startup, select the Connected option. If you clear this option, the drive will be enabled in the configuration, but not connected to the virtual machine. You can connect it later when running the virtual machine.
-
If you selected
New image File
, click
Add Device
to complete the procedure of adding a new floppy image file.
If you selected Existing Image File , specify the location of the image file and click Add Device to complete the procedure.
If you selected Real Floppy Disk , specify the drive of the real floppy disk and click Add Device to complete the procedure.
|
|
 Feedback
|