Removing a Virtual Machine From the List
When you launch Parallels Desktop, you are presented with
the
Parallels Virtual Machines
list
containing the virtual machines that are currently registered in Parallels Desktop. This feature gives you an opportunity to select a virtual machine you are going to work with.
If a virtual machine is not currently used, it can be temporarily removed from the list. When you need this virtual machine again, you will be able to add it to the list as an
existing one
.
To remove a virtual machine from the
Parallels Virtual Machines
list:
-
Launch Parallels Desktop, choose a virtual machine in the
Parallels Virtual Machines
list, and choose
Remove
from the
File
menu.
-
The
Delete Virtual Machine Assistant
welcome window appears. If you do not want this window to appear the next time you start this assistant, select
Always skip introduction
. Click
Continue
.
-
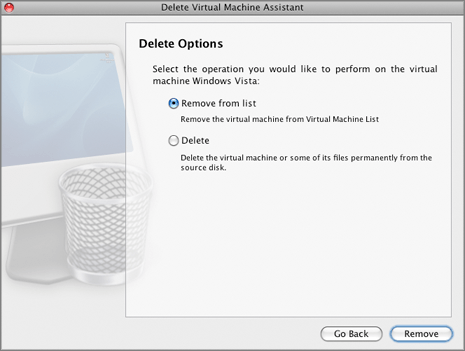
Select the
Remove from list
option and click
Remove
.

-
The assistant removes the virtual machine from the
Parallels Virtual Machines
list. If the operation was successful, the
Removal Succeeded
window appears.
-
Click
Done
to close the assistant.
Please send us your feedback on this help page
