Configuring Login Settings
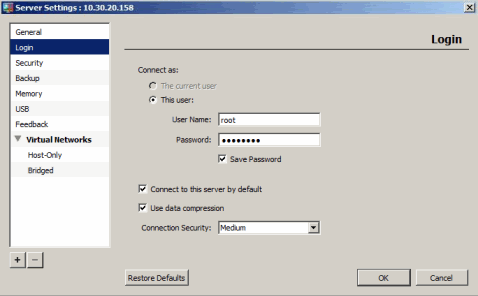
You can configure the login settings to use to connect to a Parallels server in the Login pane of the Server Settings dialog. To open this pane:
- Select the server in the Parallels Management Console sidebar.
- Choose Edit Settings from the Server menu.
-
Click
Login
in the
Server Settings
dialog.

In the Login pane, you can configure the following settings:
-
The current user
. Choose this option to connect to the server with the same user account that you used to log in to the primary operating system installed on this server.
Note: This option is available for the localhost server only, which is the server with IP address 127.0.0.1 on your network.
- This user . Enable this option and specify the user name and password to connect to this server. The name and the password you enter should be valid for the Parallels server. If you want to save the user name and password, select Save Password .
-
Connect to this server by default
. Enable this option if you want to connect to this Parallels server automatically when you start Parallels Management Console. You can also set the level of security when connecting to the server. For more information about the security levels, refer to
Security Options
.
Note: You can set only one server as the default for the connection.
- Use Data Compression . If you select this option, the data sent between Parallels Management Console and Parallels Server will be compressed. If you use low-speed connections, select this option to improve the data transfer speed.
Restore Defaults
To restore the default settings, click Restore Defaults .
|
|
 Feedback
|