|
|
|
|
General Settings
On the General Settings page, administrators can configure logging, session timeout and other security settings, and can customize the appearance of the Parallels RAS Web Portal. Parallels RAS Web Portal settings can be replicated to other servers for backup purposes. Administrators can also check for the available Parallels RAS Web Portal updates.
Logging
Administrators can enable logging on the Parallels RAS Web Portal so that they can trace changes being performed on the service.
Select Enable Logging so that the Parallels RAS Web Portal starts logging any activity that is performed.
You can refresh the log view by clicking the Refresh button.
To clear the log entries, click on Clear Log and the system will remove the previous logs from the log view.
A copy of current logs can be downloaded from the Parallels RAS Web Portal by clicking the Download repository button. By default, a compressed log file is backed up on a weekly basis so that administrators can backtrack any logs if needed. Please note that this function downloads all the available logs (not just the Web Service logs).
System Settings
System Settings are divided in two sections: Logon settings and Security Settings .
In the Logon Settings section, the Session Timeout option specifies the possible idle time that the Parallels RAS Web Portal logon and administrative pages can remain without interaction before the pages prompt the user that the session has timeout and they will be automatically logged off the Parallels RAS Web Portal. The session timeout value is set to 20 minutes.

The Security Settings enhance security when logging into Parallels RAS Web Portal and when connecting to a RAS Secure Client Gateway.
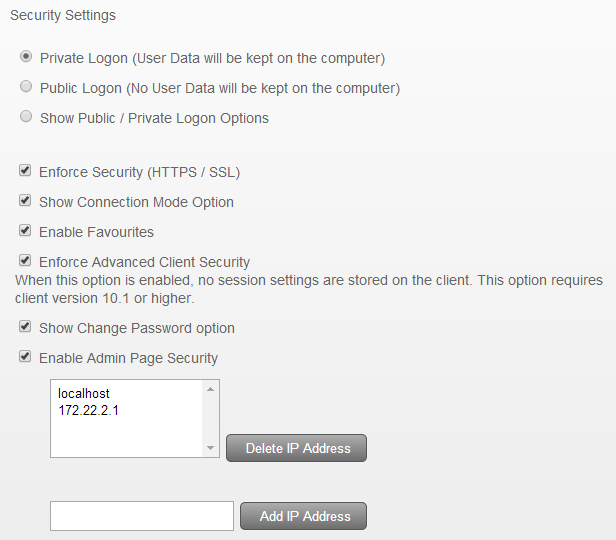
The security settings that can be set are described below.
Private Logon . Selecting this option will allow user data to be stored on the local computer. The data remains cached in the browser and will not be cleared when the user logs off the session.
Public Logon . Selecting this option will not allow user data to be stored on the local computer. The data will not remain persistent and will be cleared when the user logs off the session.
Show Public / Private Logon Options . Enable this option to allow the users to choose whether to connect as ‘Public’ or ‘Private’. This option will be displayed on the Parallels RAS Web Portal User Logon Page.
Enforce Security (HTTPS / SSL) . Enable this option to force the user to connect to the Parallels RAS Web Portal in SSL (HTTPS) mode. Users will not be allowed to connect to the ‘Farm’ if SSL is not enabled from the RAS Console.
Enable Favorites . Enable this option to show Favorites inside the User Logon Page.
Enforce Advanced Client Security . Enable this option, to only open the .2xa files when the user is logged on to the Parallels RAS Web Portal. Please note that a user cannot open the .2xa files when the Parallels RAS Web Portal session times out.
Show changed Password option . Enable this option, to show the ‘Change Password’ option on the User Logon Page.
Enable Admin Page Security . Enable this option so that administrators can only log into the Administrative Page from a machine that matches an IP address from the specified list. To add an IP Address, type it in the field provided and then click Add IP Address .
After configuring the System Settings, select Apply Settings so that the settings are saved.
Parallels Clients
To launch published applications and desktops, the Parallels Client needs to be installed on the Client. The Parallels RAS Web Portal can be configured to detect the Parallels Client automatically.
To detect Parallels Client Installation, select the Client Detection option.
If Parallels client detection fails, users can be notified by means of Client Detection Failure Options . The administrator can select from the following:
- Show error message and allow retest . Select this option so that an error message is shown and the user is allowed to perform a retest to detect the Parallels Client. This option will not provide the option to install the Parallels Client.
- Show error message and allow installation or retest . Select this option so that an error message is shown, providing the option to install the Parallels Client. The user can also choose to perform a retest to detect the Parallels Client.
- Show error message and allow installation . Select this option so that an error message is shown and an option is provided to install the Parallels Client. This option will not give the option to retest for Parallels Client detection.
- Show error message only . Select this option so that an error message is shown without providing the option to install or retesting for Parallels Client.
The Parallels Client can be downloaded for different OS platforms. The table below illustrates the platforms supported by the Parallels Client and the type of installation packages that can be downloaded for every OS.
|
OS |
Installation Type |
Description |
|
Windows |
Full Client installation |
This will perform the Parallels Client installation installing full resources. |
|
|
Basic Client installation |
This will perform Parallels Client installation using minimal resources. |
|
Linux |
.deb package |
This will download the Debian package from the Parallels website. |
|
|
.rpm package |
This will download the RPM Package Manager from the Parallels website. |
|
|
.tar.bz2 |
This will download Parallels Client for Linux as a compressed file from the Parallels website. |
|
Mac |
.pkg |
This will download Parallels Client from the Mac store and install it on the macOS desktop. |
|
Android |
.apk |
This will download Parallels Client from the Google Play and install it on the Android device. |
|
iOS |
|
This will download Parallels Client from App Store and install it on the iOS device. |
Customized Appearance
Customized appearance allows administrators to customize how the Parallels RAS Web Portal looks. Administrators can customize the Parallels RAS Web Portal by displaying a different company name, adding a custom banner, changing color themes and more.
To add settings to customize the appearance for Parallels RAS Web Portal, insert a friendly settings name inside the input text fields. Click Add Settings or press Enter to start customizing appearance settings.
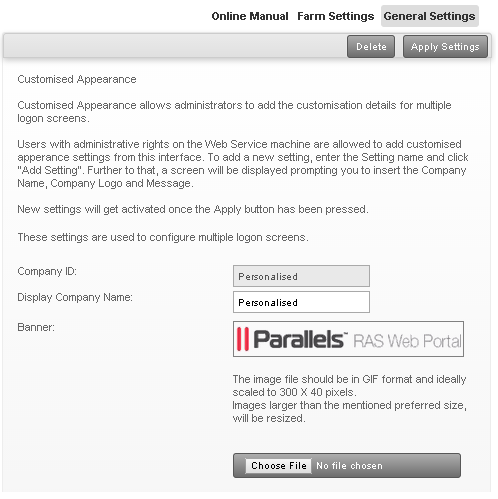
You can customize settings as described below.
Company ID . This setting is set by default in the same name when creating settings to customize the appearance for the Parallels RAS Web Portal.
Display Company Name . Type in a name that you want to display as company name other than the default setting set when creating settings to customize appearance.
Banner . Custom banners can be added to the Parallels RAS Web Portal. The banner should be an image in GIF format, and a size of not more than 300 x 40 pixels.
To upload a banner click the "Browse" button and select the banner. Click "Upload" so that the banner will be uploaded to the RAS Web Service machine.
Message . To display a message underneath the logon section when logging into Parallels RAS Web Portal from the ‘User Logon Page’, type inside the input text field. This can be used to describe the customized Parallels RAS Web Portal.
URL . The URL states provides the link so that users can connect to the customized Parallels RAS Web Portal. This is automatically generated when creating new customized settings.
Note: The server which has the Parallels RAS Web Portal installation must be publicly accessible so that users can access the User Logon page.
Default Domain . Insert the default domain so that users will automatically log with the default domain when logging into the ‘User Logon Page’.
Color Modification . From this section, administrators can configure the color scheme for every customized appearance. You can configure the colors by means of the color picker or color themes as illustrated below. More color themes can be created by picking other colors from the color picker. You can reset the Color Themes to default by clicking the Reset button.
|
|
 Feedback
|