Share Files and Folders
Parallels Desktop allows you to share folders between the macOS and Windows file systems, so you can easily open macOS files from Windows applications and Windows files from macOS applications.
Note: These instructions apply to sharing folders between macOS and Linux as well.
Access a macOS Folder or File from a Windows Application
With folder sharing enabled, you can navigate to any shared macOS folder from within a Windows application. When you open a file (for example, by choosing File > Open in many applications), your shared macOS folders appear as network shared directories labeled "psf."
To enable macOS folders for sharing with Windows applications:
- Start Windows.
- Do one of the following:
- Click the Parallels icon
 in the menu bar and choose Configure.
 - If the Parallels Desktop menu bar is visible at the top of the screen, choose Actions > Configure.
- Click the Parallels icon
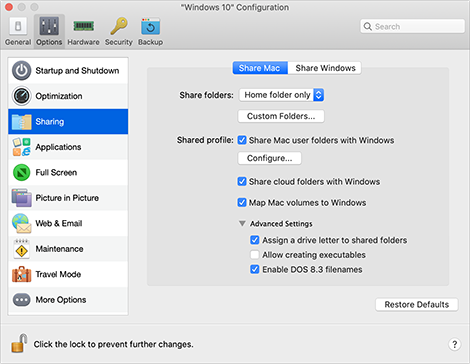
- Click Options and select Sharing > Share Mac.
- Do one of the following:
- To share just the folders in your Home folder, choose Home folder only from the Shared Folders menu.
- To share all your macOS folders, choose All disks from the Shared Folders menu.
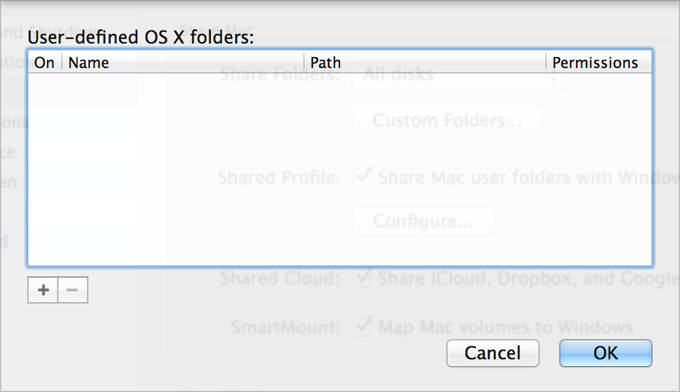
- To share any folder you want, click Custom Folders and click the add (+) button, then choose the folder you want to share. You can add more folders by clicking the add (+) button again.
Once you share a macOS folder with Windows you can:
- Disable the folder sharing by deselecting On.
- Change the folder name that will be displayed in Windows by double-clicking the folder name in the Name column and typing another name.
- Restrict writing to this folder by clicking Read & Write in the Permissions folder and choosing Read only. You will not be able to add items to the folder.
Note: 1. To enable folder sharing, the Isolate Windows from Mac option must be disabled on the Security tab of the Configuration dialog.
2. If you're running Linux, shared folders are mounted to the /media/psf or /mnt/psf directory.
Set macOS and Windows to Use the Same Folders
You can set macOS and Windows to use the same folders for things like music, documents, pictures, your desktop, and deleted files. So for example, if you save a file to the Documents folder, it will be in the Documents folder whether you're using a macOS application or a Windows application.
- Start Windows.
- Do one of the following:
- Click the Parallels icon in the menu bar and choose Configure.
- If the Parallels Desktop menu bar is visible at the top of the screen, choose Actions > Configure.
- Click the Parallels icon
- Click Options and select Sharing.
- Click the Share Mac tab and select Share Mac user folders with Windows.
Your macOS
Desktop,Documents,Pictures,Music,Movies, andDownloadsfolders are merged with the corresponding Windows folders, and the macOS Trash is merged with the Windows Recycle Bin. - If you only want to map some of the folders, click Configure and select the folders you want. To map the macOS Trash to the Windows Recycle Bin, select Merge Recycle Bin with Trash.
Show an Item from Windows in the Finder
You can show an item from Windows in the macOS Finder.
- In Windows, right-click (or Control-click) a file or folder and choose Show in Finder from the shortcut menu.
From the Finder you could, for example, apply a color label to an item, or easily drag it to another location in the Finder.
Note: You can only perform these actions with files stored in shared folders.
Share a file from Windows via Mac services
You can share files from Windows via Mac services like AirDrop, Mail, Twitter, Facebook.
In Windows, right-click (or Control-click) a file or folder and choose Share on from the shortcut menu.
Note: You can only perform these actions with files stored in shared folders.
Use Quicklook in Windows File Explorer
You can quickly preview a file or set of files using the macOS Quick Look functionality.
- In Windows, select a file or set of files to preview and press the Space key.
- If you're using a touchpad, select a file and use the three-finger tap gesture (or force-press gesture on newer Macbooks).
Note: You can only perform these actions with files stored in shared folders.
Access Windows Disks from the Finder or Desktop
If you need to have a quick access to Windows disks, you can add them to the Finder or desktop. Do the following:
Note: To add Windows disks to the Finder or desktop, the virtual machine must be running and the Connected servers option selected on the General tab of Finder Preferences.
- Open the Finder and select All in the Shared section.
- Find and expand your virtual machine.
- Double-click the disk you want to add to the Finder or desktop. The disk gets mounted and shown on the desktop. Then you can do the following:
- To add the disk to the Finder, drag it from the desktop to the Favorites section in the Finder.
- To make the disk display on the desktop, create an alias for it. Right-click the disk and select Make Alias.