Creating a Virtual Machine for the Boot Camp Partition
To create a new virtual machine for using the Boot Camp Windows XP (SP2 or SP3) or Windows Vista (SP1) partition, do the following:
-
Boot into Mac OS X.
-
Start Parallels Desktop and launch New Virtual Machine Assistant by clicking
New Virtual Machine
on the
File
menu or choosing
Virtual Machines Directory
from the
Window
menu and clicking the
 button in the displayed window.
-
In the
Introduction
window, click
Continue
to proceed with the virtual machine creation.
-
In the
Operating System Detection
window, click
Skip Detection
.
-
In the
Select Operating System Type and Version
window, select the type and version of guest OS you want to install in this virtual machine and click
Continue
.
You can either select an operating system from the list, or select
Other
in case you cannot find the required one there.
-
In the
Virtual Machine Type
window, select
Custom
and click
Continue
.
-
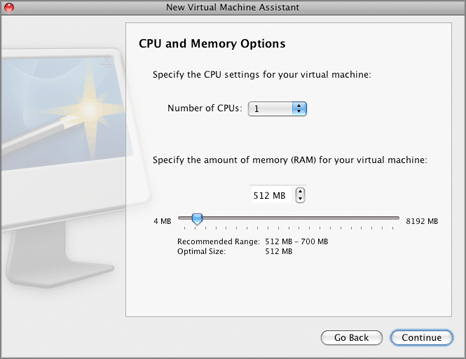
In the
CPU and Memory Options
window, specify the number of CPU(s) and the amount of RAM for the virtual machine and click
Continue
. You may use the slider or arrow buttons to set the value or simply type it into the corresponding field.
-
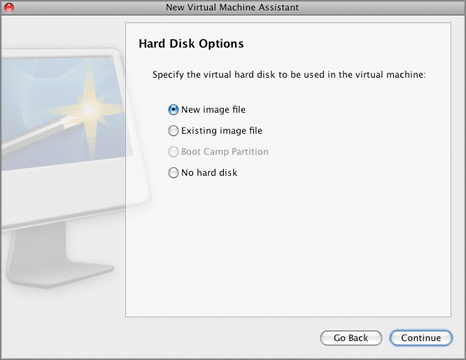
In the
Hard Disk Options
window, select
Boot Camp
. Click
Continue
.
-
In the
Boot Camp Disk
window, specify some details: the physical disk where this Boot Camp partition is located on your Mac and the Boot Camp disk IDE position in your future virtual machine. Click
Continue
.

-
Then proceed as described in the
Custom Installation Mode
section
.
Please send us your feedback on this help page