|
|
|
|
Configure the Azure Application for Parallels RAS
To configure the Azure application to work with Parallels RAS, do the following:
-
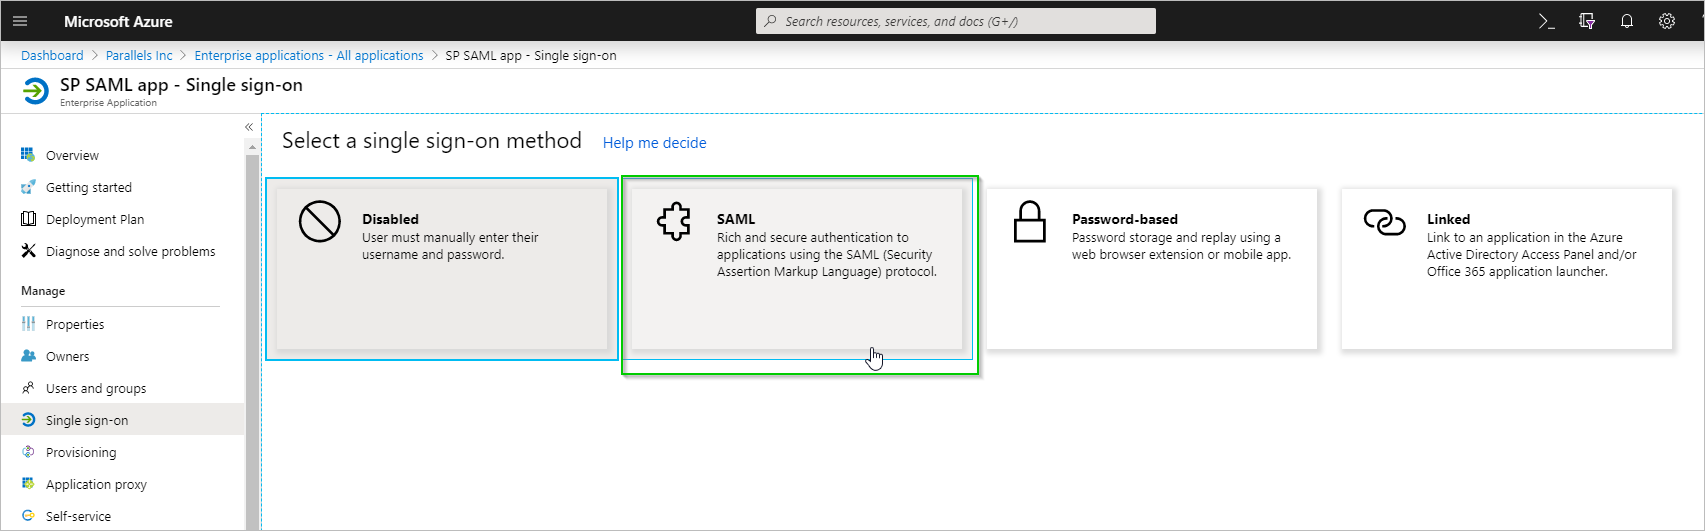
In Azure Portal, click on the
SAML
application tile and switch to the
Single Sign-on
pane >
SAML
.
-
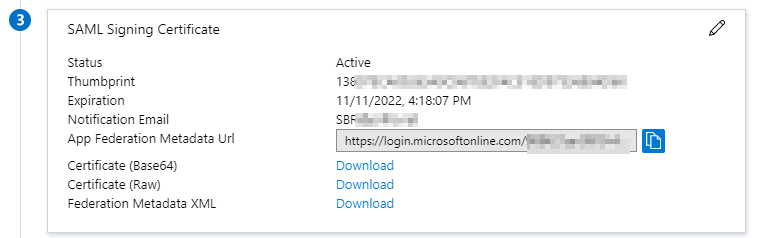
In section
(3) SAML Signing Certificate
, copy the
App Federation Metadata Url
value.
Note: For manual configuration, you can download Certificate (Base64) and Federation Metadata XML by clicking the corresponding Download links.
- Open the Parallels RAS Console, navigate to Connection > SAML and click Tasks > Add .
-
In the
Add Identity Provider
wizard, import metadata from a file or specify its URL and choose an HTML5 Theme to associate the IdP with.
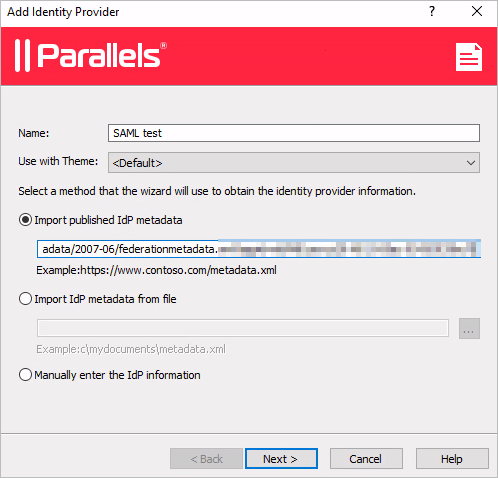
- Click Next .
-
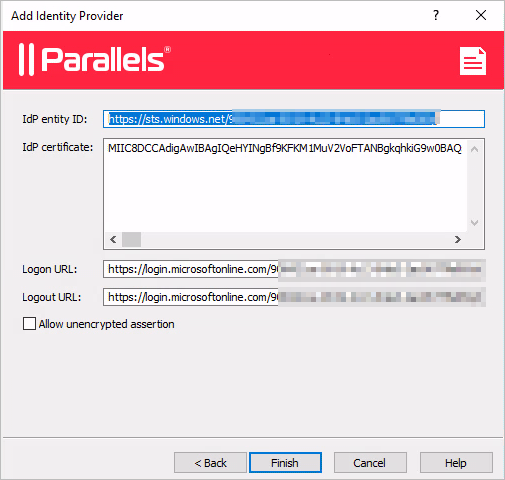
On the next page of the wizard, the
IdP certificate
and
Logon
/
Logout
URL
fields will be automatically populated. Verify that everything is correct and click
Finish
.
Important: The Allow unencrypted assertion option must be cleared in case you did not configure assertion encryption in Azure.
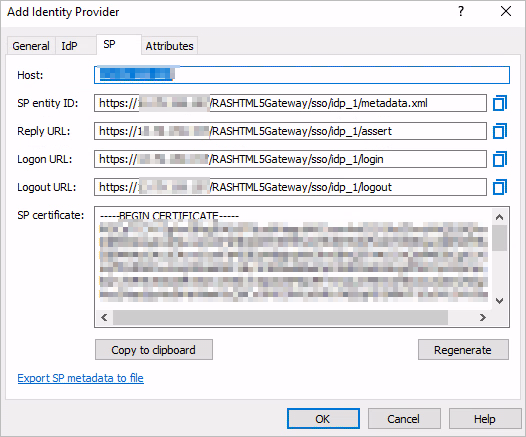
- Back in the RAS Console, right-click on the IdP provider you just created and choose Properties .
-
In the dialog that opens, select the
SP
tab. Take a note of the information displayed here.
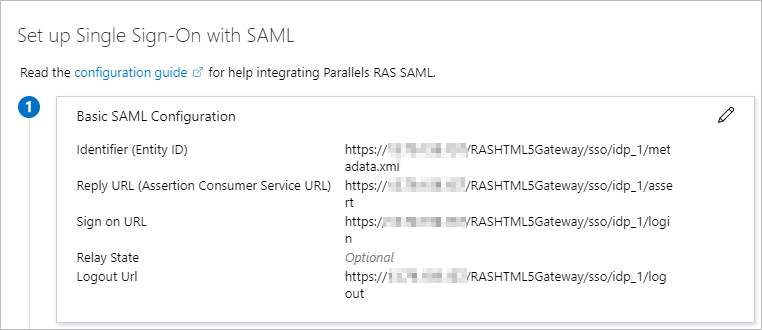
-
Switch back to the SAML application in Azure Portal. Specify the values in section
(1)
Basic SAML Configuration
according to the values in the
SP
tab in the RAS Console (see above).
-
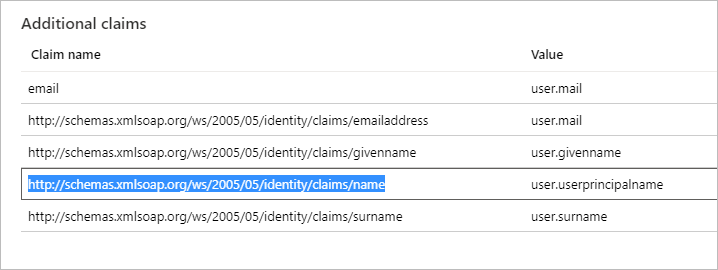
Next required step is to configure attributes to match IdP users with AD users. In this example, the custom attribute is used with the following setup:
- In Azure Portal > SAML app > Single Sign-On , open section (2) User Attributes & Claims .
- From the Claim name list, copy the name of the user.userprincipalname value:
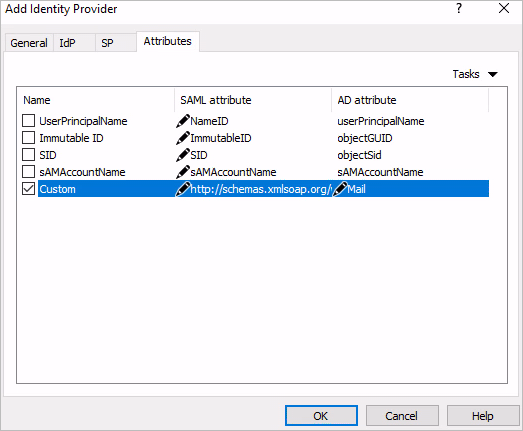
-
Back in the RAS Console, in the
Add Identity Provider
dialog, select the
Attributes
tab, enable the
Custom
attribute and set its value to be the claim name you copied in the previous step.
You may also use Azure AD Connect to match users via "Immutable ID". To do so, in Active Directory, create an attribute using the following values:
- Name: ImmutableID
- Source: attribute
- Source attribute: user.onpremisesecurityidentifier
Further information available at docs.microsoft.com
|
|
 Feedback
|