|
|
|
|
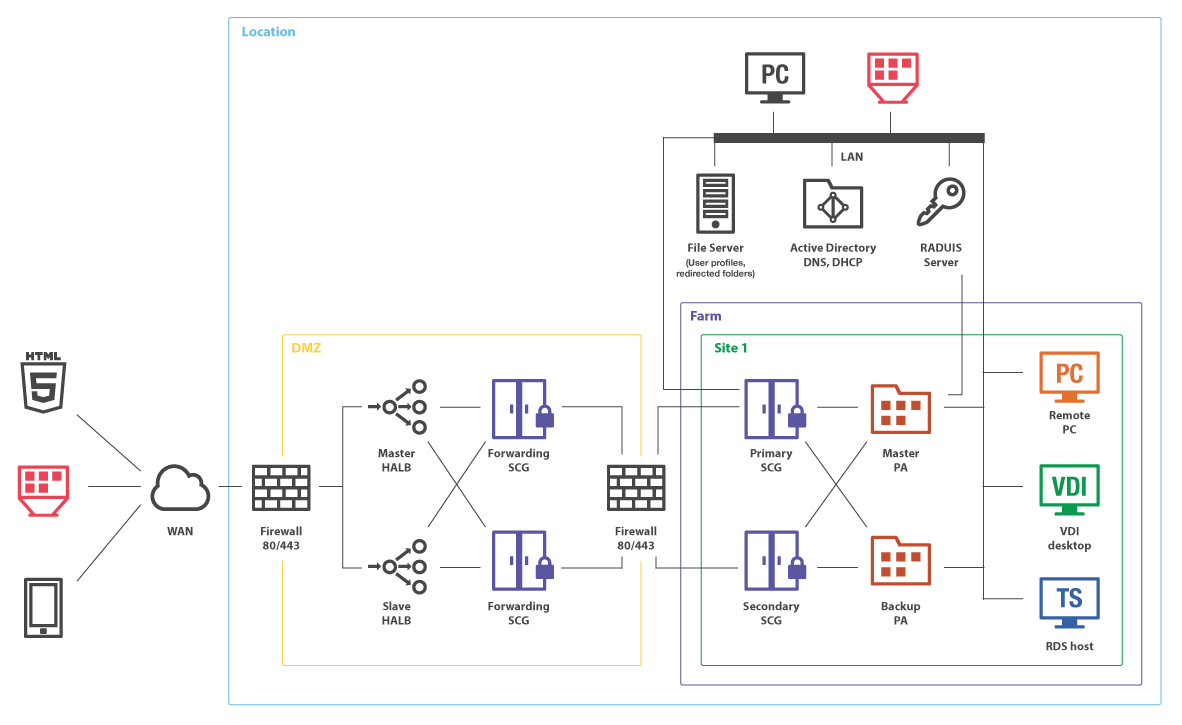
Using RADIUS
The below diagram shows a typical Parallels Remote Application Server scenario with Parallels Publishing agent connected to a Radius server.
To configure Radius properties:
- In the Parallels RAS Console, navigate to the Connection > Second Level Authentication tab.
- In the Provider drop-down list, select Radius .
-
Click the
Settings
button. The
Radius Properties
dialog opens. On the Connections tab page, specify the following options:
- Type Name: Specify the name of the OTP connection type that will be displayed on the Logon screen on the client side. This should be the name that your users will clearly understand.
- Server: Enter the hostname or IP address of the Radius Server.
- Port: Enter the port number for the Radius Server. Click the Default button to use the default value.
- Timeout: Specify the packet timeout in seconds.
- Retries: Specify the number of retries when attempting to establish a connection.
- Secret Key : Type the secret key.
- Password Encoding: Choose from PAP (Password Authentication Protocol) or CHAP (Challenge Handshake Authentication Protocol), according to the setting specified on the Radius Server.
- Click the Check connection button to validate the connection. If the connection is configured correctly, you will see a confirmation message.
-
If your Radius vendor requires specific attributes, click the
Attribute
tab and then click
Add
. In the Radius Attribute dialog, specify the following:
- In the Vendor drop-down list, select a vendor.
- In the Attribute list, select a vendor attribute.
- In the Value field, enter a value for the selected attribute type (numeric, string, IP address, date, etc).
- Click OK and then click OK again to close all dialogs.
|
|
 Feedback
|