|
|
|
|
Prepare VMware vSphere for Parallels RAS
RAS VDI Agent System requirements
- VMware ESXi
- VMware vSphere Client
- VMware vCenter
Starting from vSphere v5.1 it's possible to use the vSphere Web Client instead of the native vSphere Client.
Before continuing to set up your environment, please make sure that your VMware vSphere Client can connect to your VMware vSphere server.
A guest operating system (Windows) must be created on the VMware vSphere server which features an RDP server.
Ideally, the guest VM name should be equal to the computer name.
The use of fixed IPs on the guest operating systems is preferred.
After the guest OS installation is complete, make sure that the RDP server is started. To confirm that the server is running, launch a Remote Desktop Client and connect to the guest operating system using the computer name (of the guest OS) and the RDP port (default RDP port is 3389).
Setting up the RAS VDI Agent Appliance for VMware vSphere
Instructions for the native vSphere Client:
- Extract the ZIP file contents into a temporary directory.
-
Login with the VMware vSphere client.
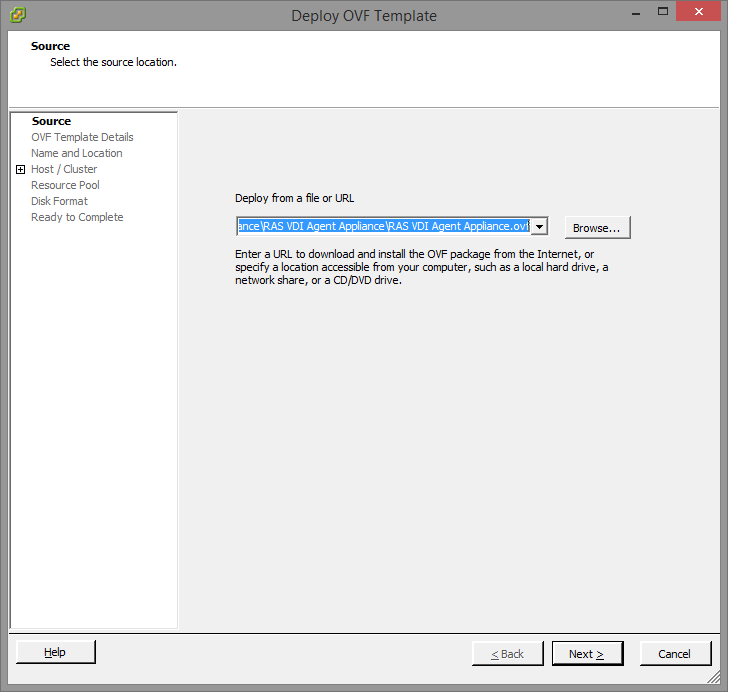
- Select Deploy OVF Template from the file menu.
-
Browse to the folder where the ZIP file (containing the appliance) was extracted and click
Next
.

-
Review product details and click
Next
.
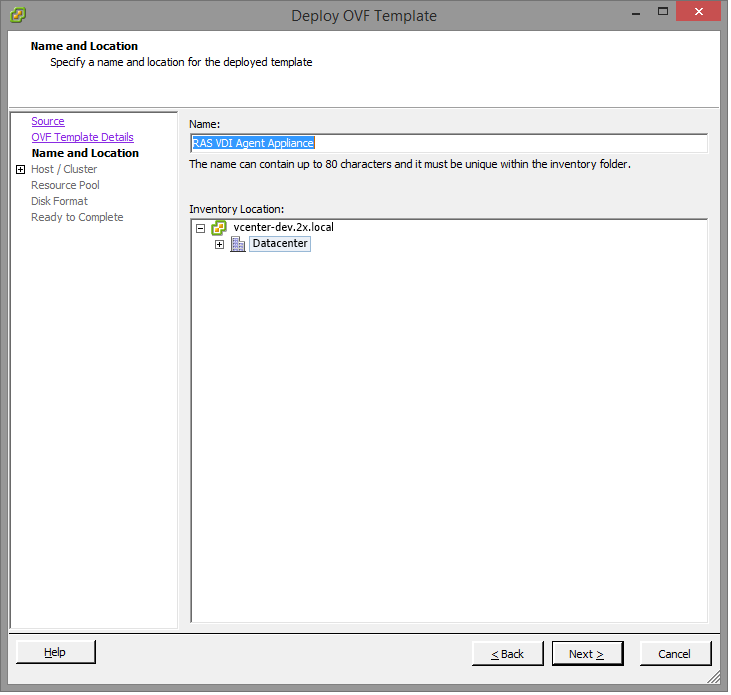
-
Choose a name and location for the deployed template and click
Next
.
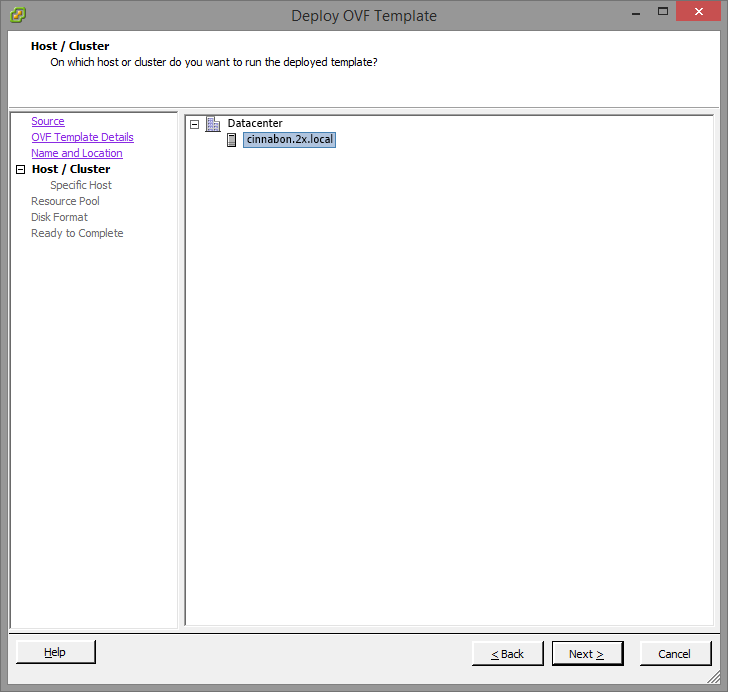
-
Choose on which host or cluster to deploy the template and click
Next
.
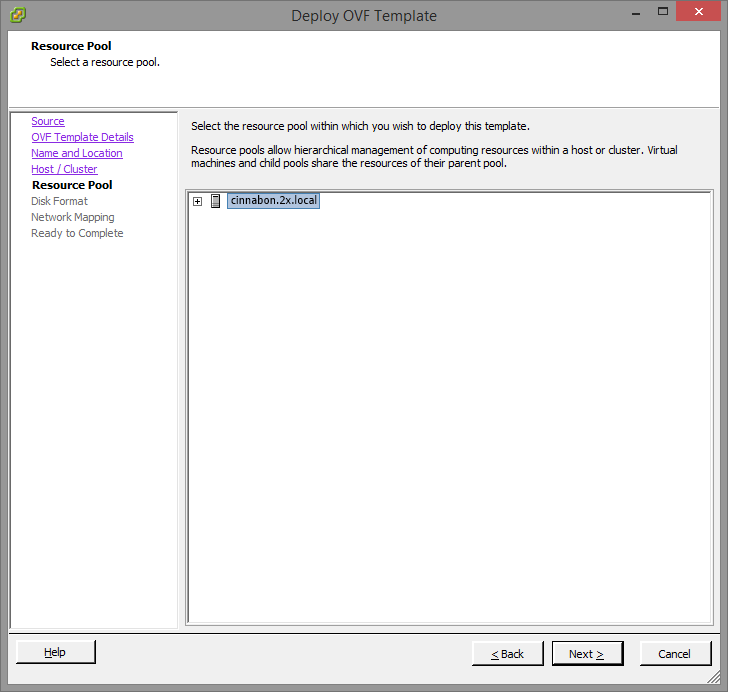
-
Choose the desired resource pool and click
Next
.
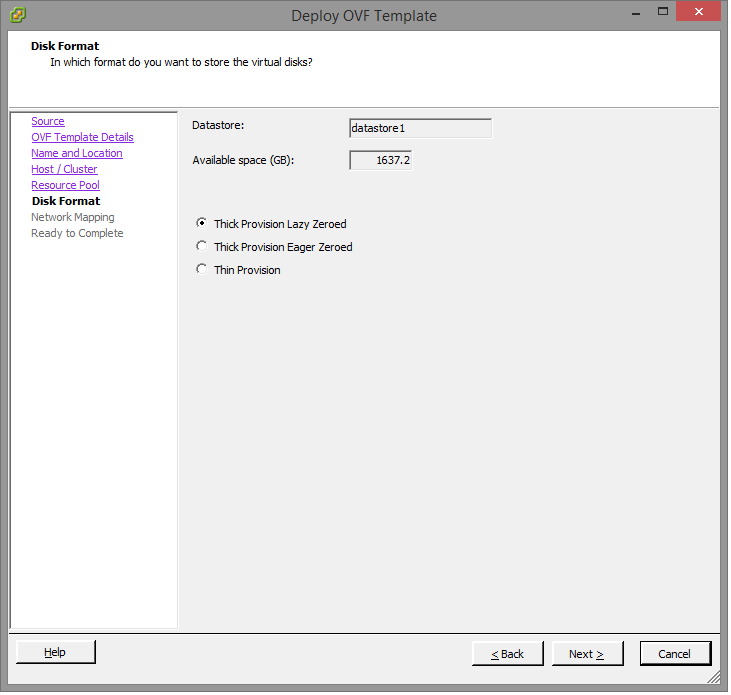
-
Choose the desired disk provisioning format and click
Next
.
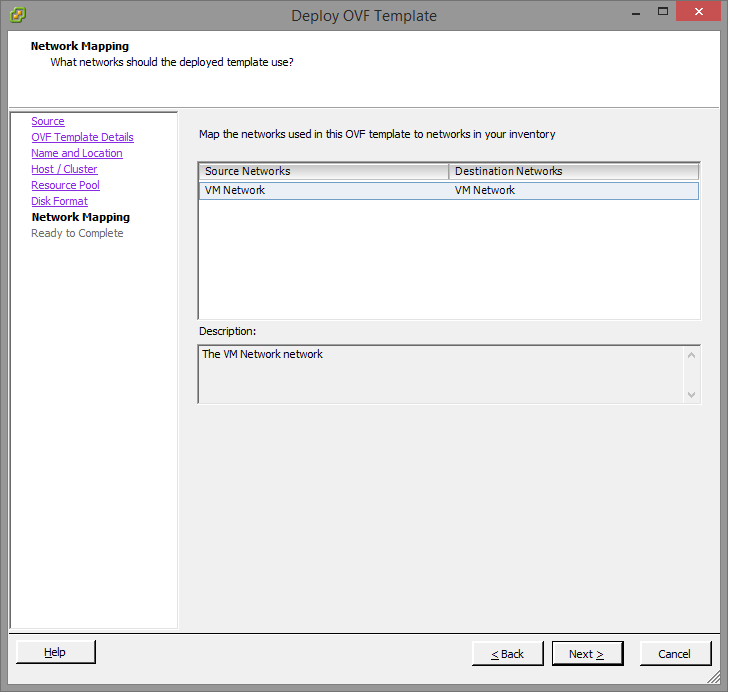
-
Choose the appropriate VDI network for the appliance and click
Next
.
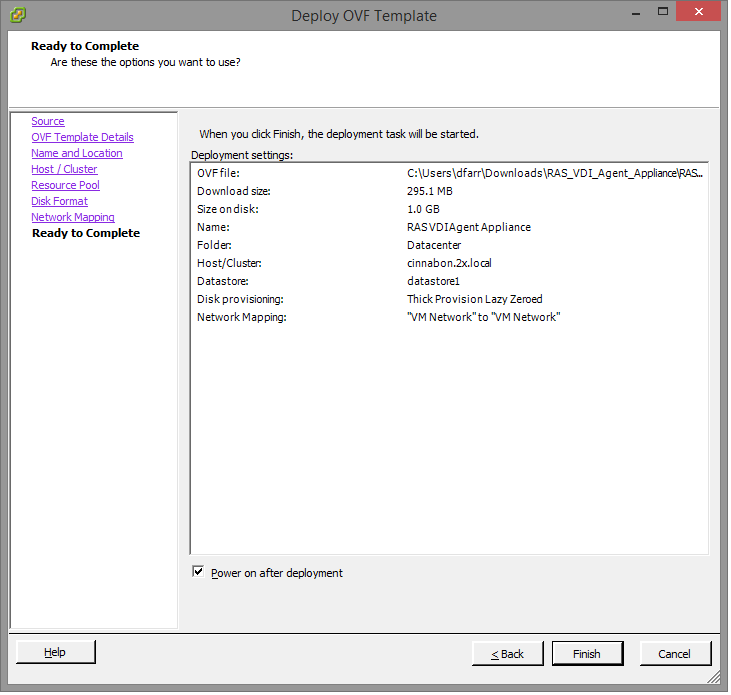
- Select the Power on after deployment option.
- Click Finish and wait for the import job to complete.
Instructions for the vSphere Web Client:
- Extract the ZIP file contents into a temporary directory.
-
Login into the vSphere Web client.
-
Navigate to
Home
>
vCenter
>
VMs and Templates
.
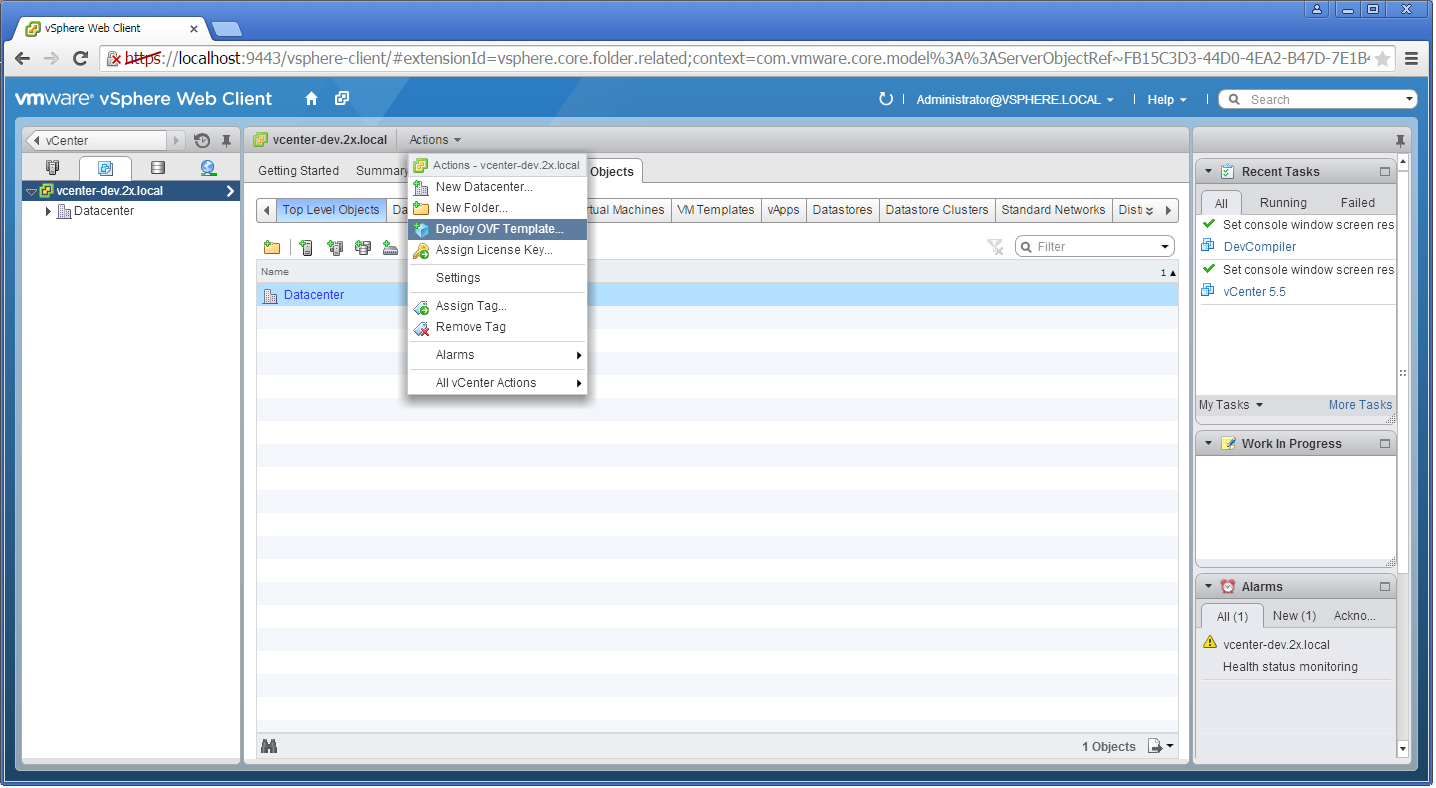
-
Choose vCenter host and select
Deploy OVF Template
from the
Actions
menu.
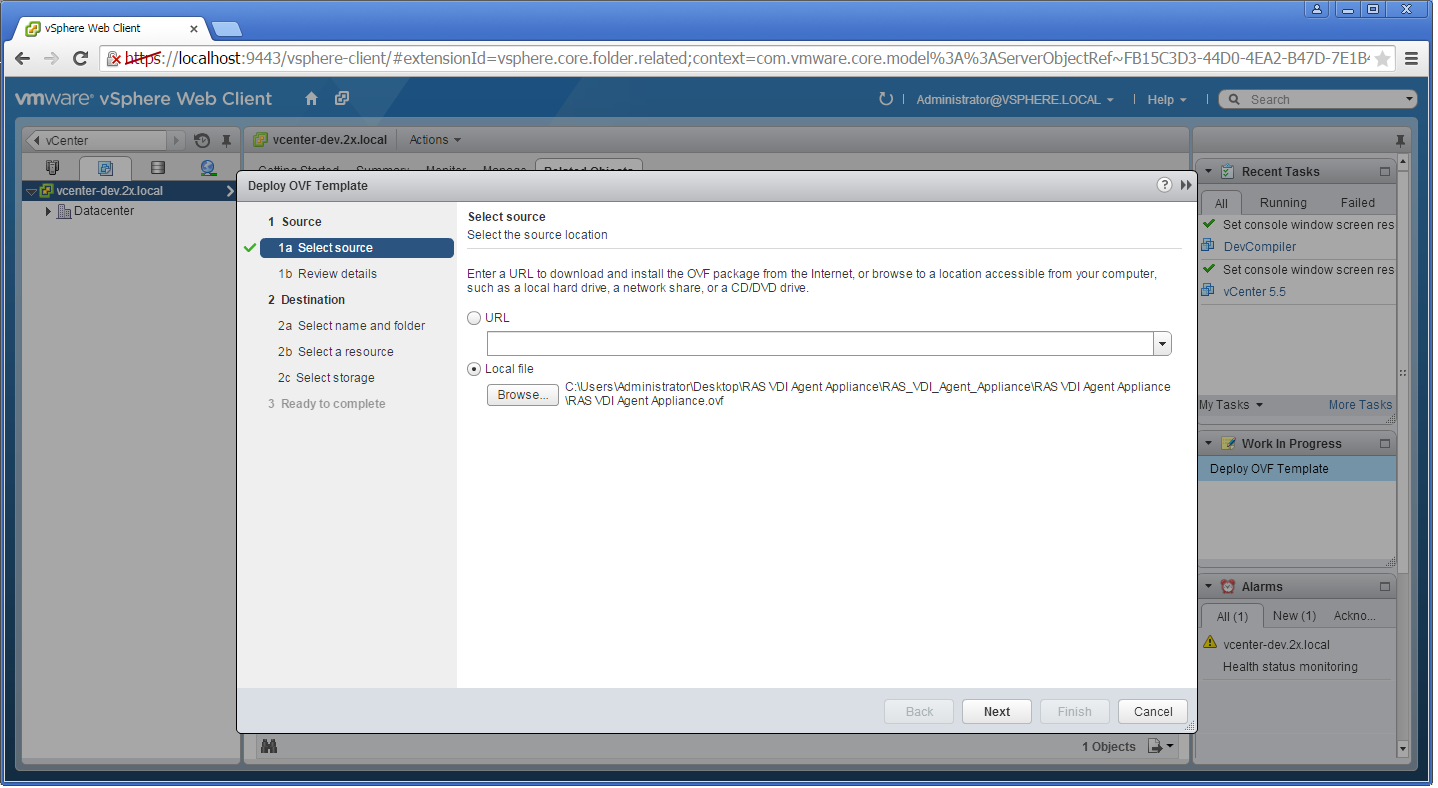
-
Choose
Local file
and browse to the folder where the ZIP file (containing the appliance) was extracted and click
Next
.
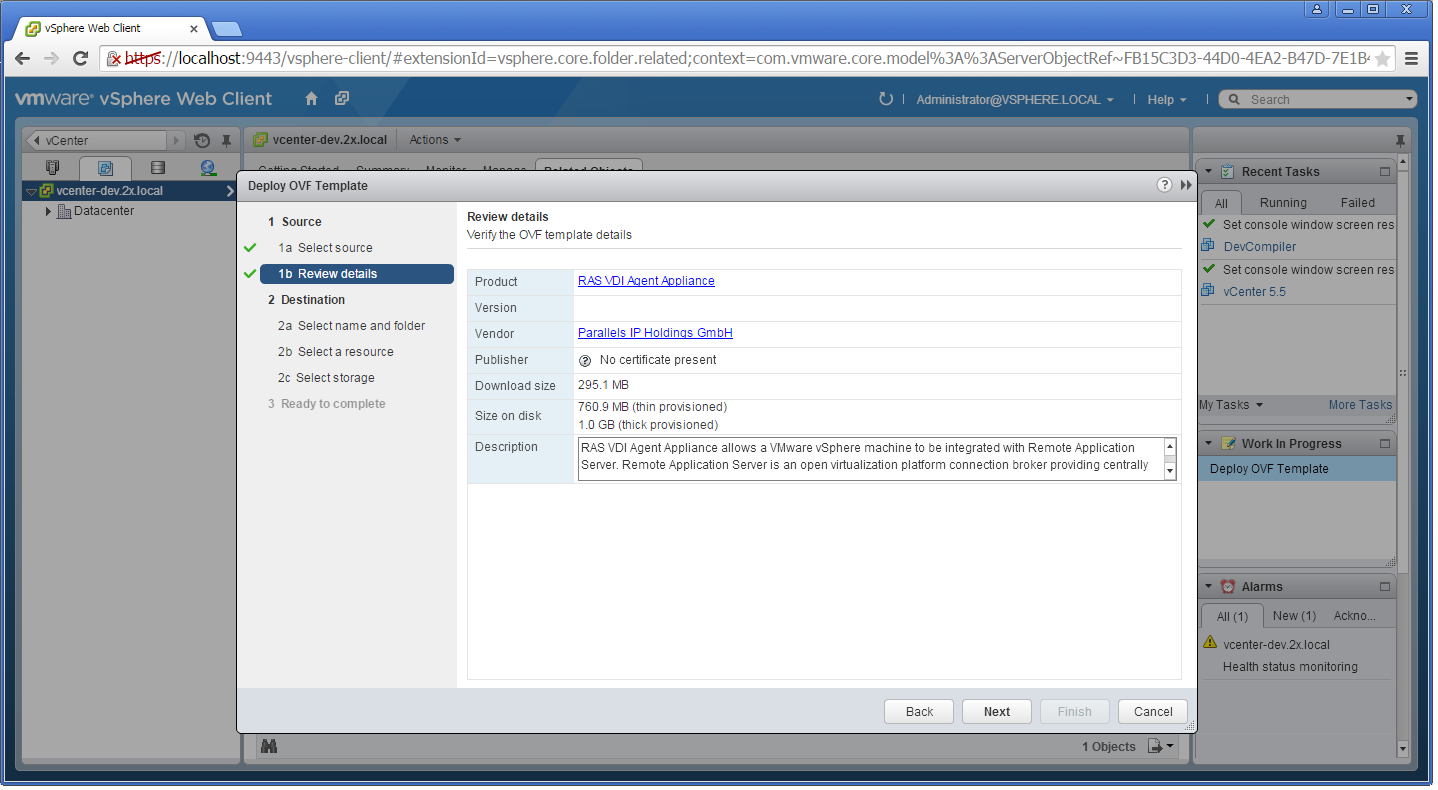
-
Review product details and click
Next
.
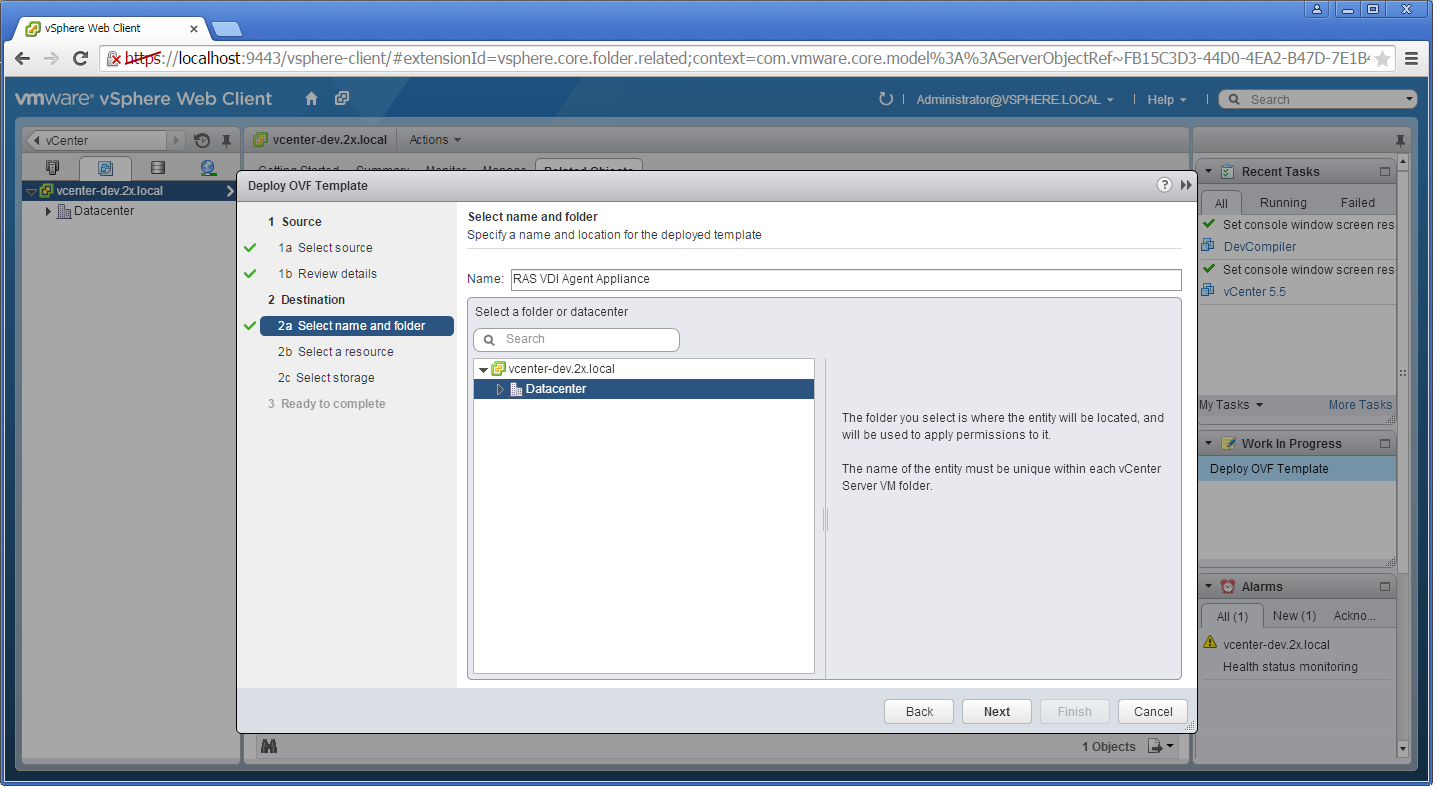
-
Choose a name and location for the deployed template and click
Next
.
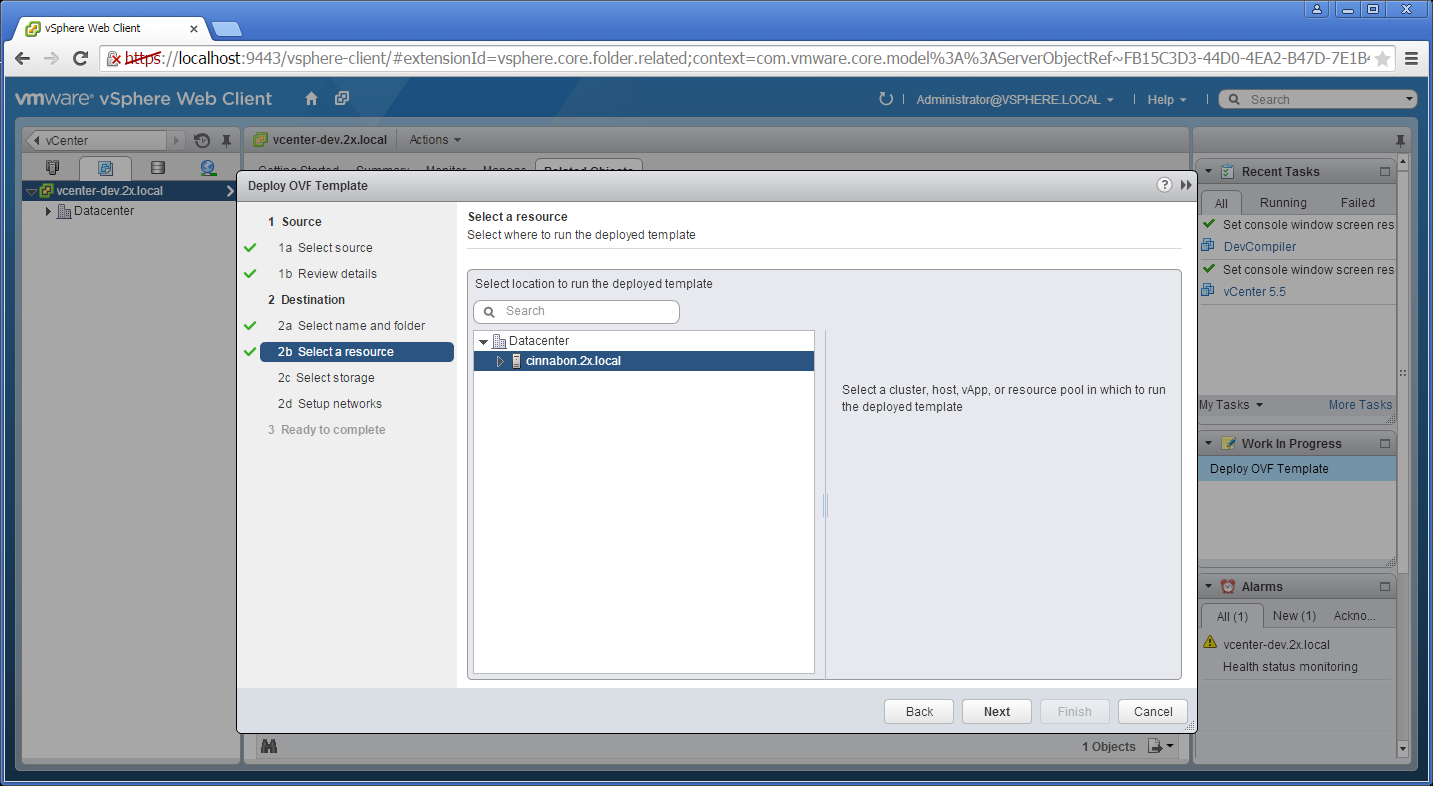
-
Choose on which host or cluster to deploy the template and click
Next
.
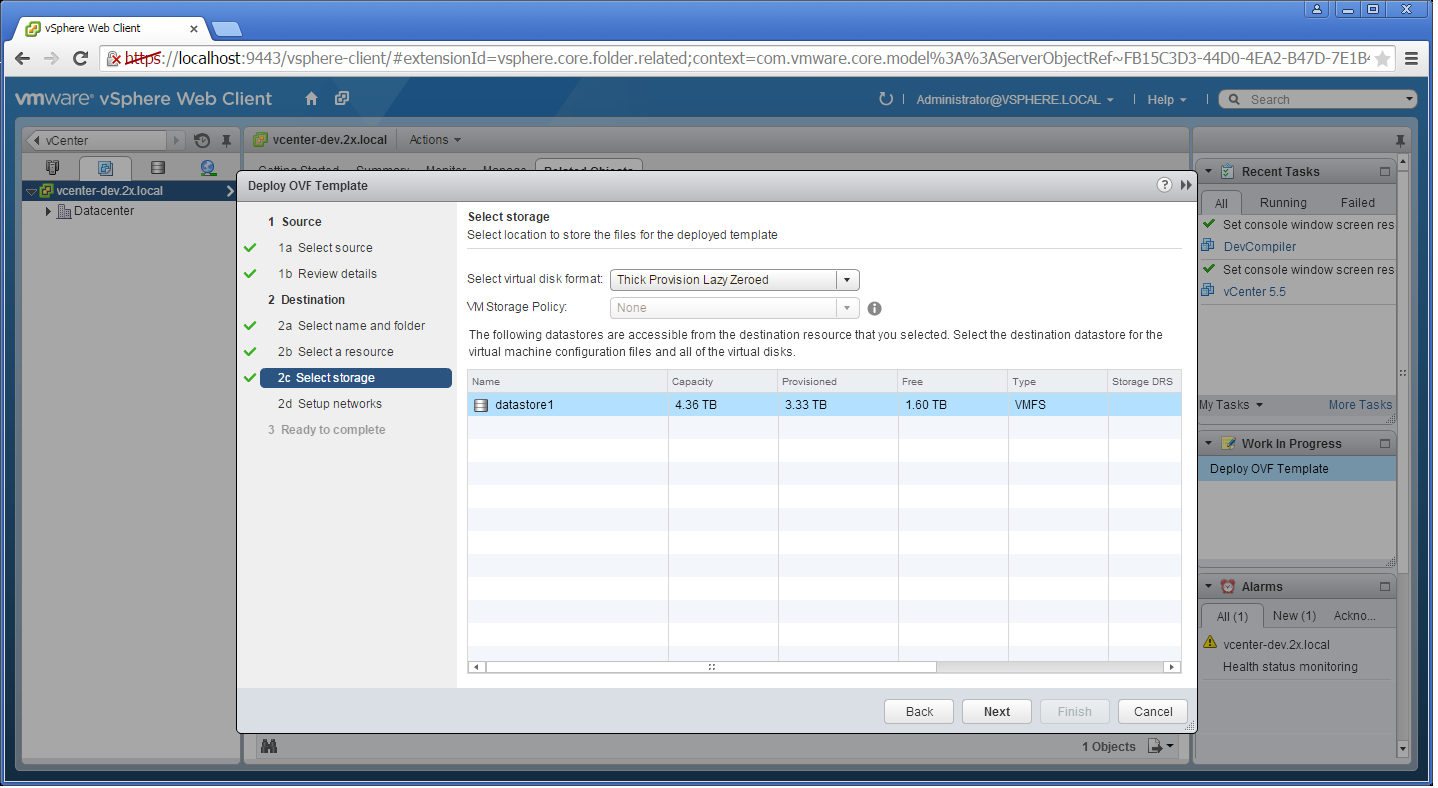
-
Choose the desired storage settings and click
Next
.
-
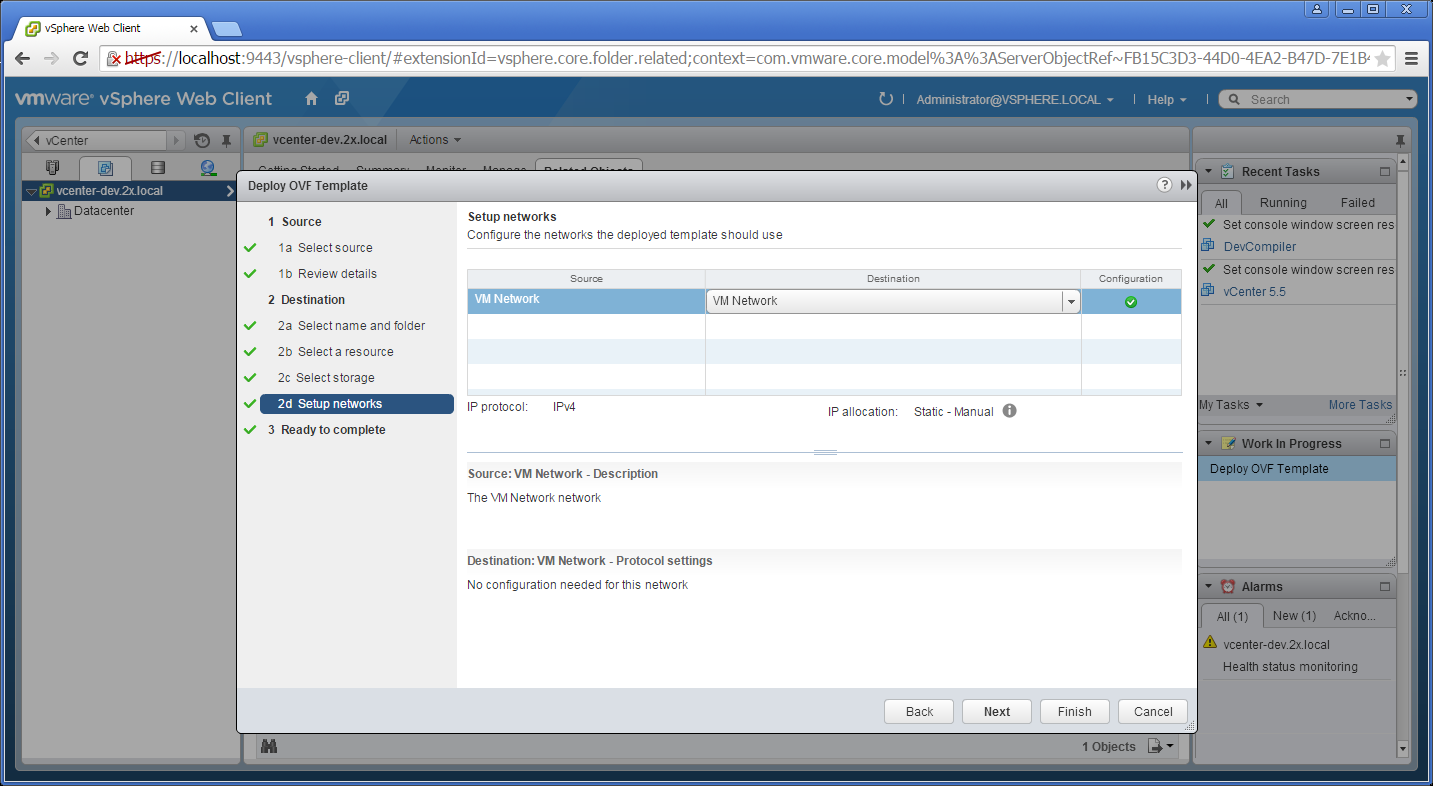
Choose the appropriate VDI network for the appliance and click
Next
.
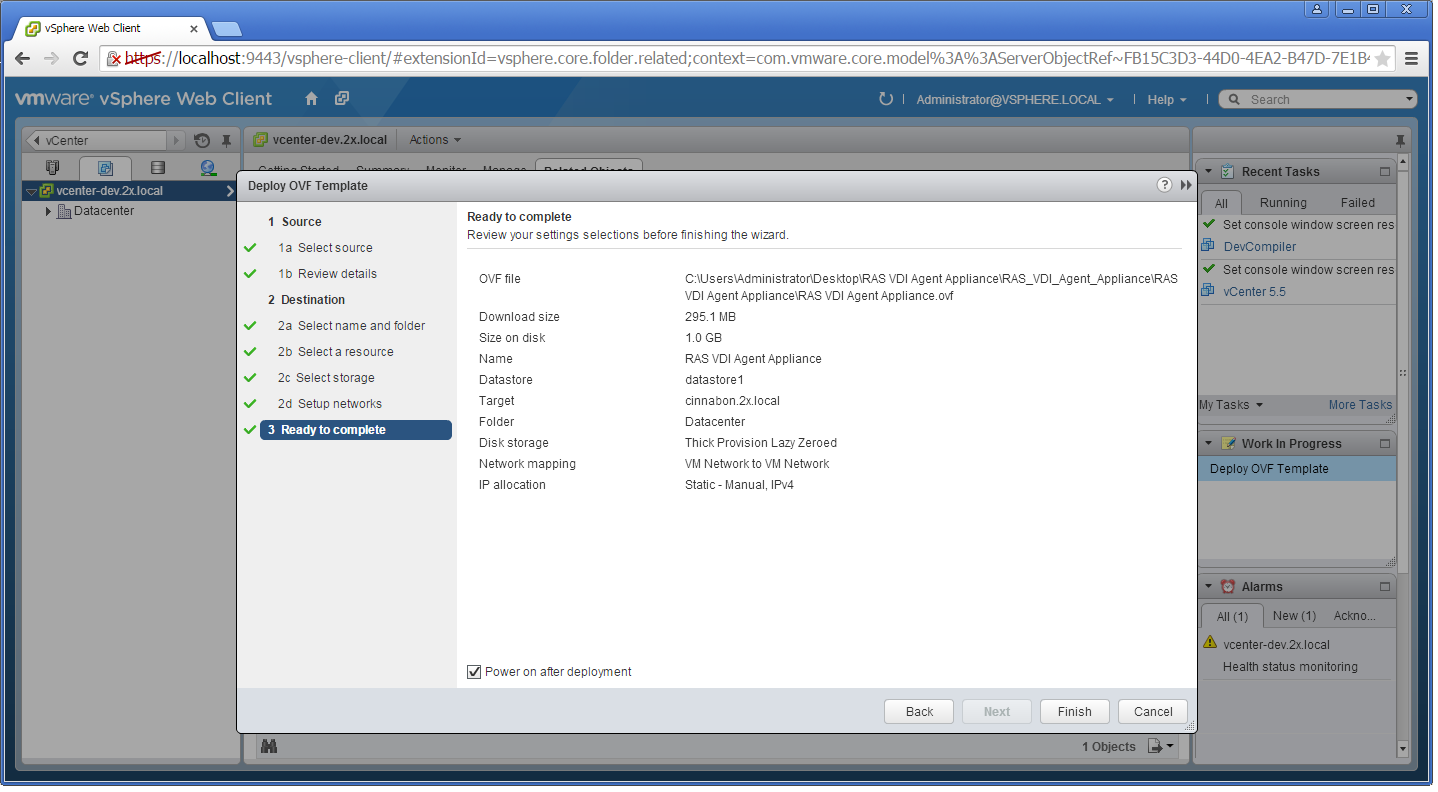
- Select the Power on after deployment option.
- Click Finish and wait for the import job to complete.
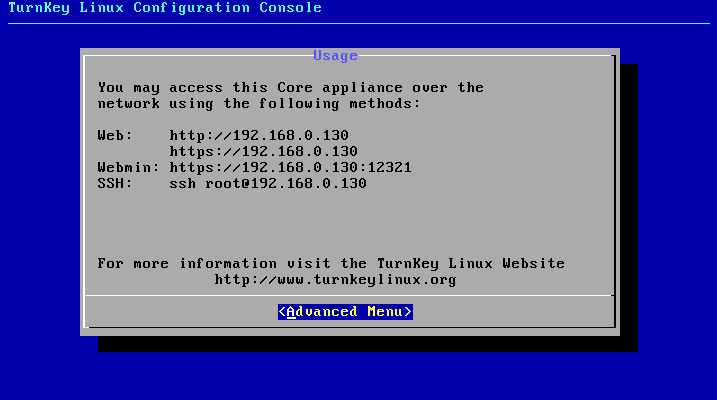
The network administrator should assign a fixed IP address to the appliance. When using DHCP, take note of the MAC address assigned to the appliance and add a DHCP reservation. If DHCP isn't available, a static IP needs to be configured manually. Network settings can be changed by going to the Advanced > Networking menu.
Refer to VMware's website for further information on deploying virtual appliances with VMware products.
|
|
 Feedback
|