|
|
|
|
Deploying with Jamf Pro
Jamf Pro includes the Software Distribution functionality that you can use to deploy the Parallels Desktop package to Mac computers in your organization. To deploy the package you need:
- Jamf Pro server installed and configured.
- Target Mac computers enrolled in Jamf Pro.
- A distribution point (cloud or file share) configured and be accessible from the target Mac computers.
Add a distribution point
A distribution point is a server that hosts files for distribution to computers. If your Jamf Pro installation doesn't have a distribution point, you need to add one to host the Parallels Desktop deployment package.
To add a distribution point:
- Open the Jamf Pro console and log in to your Jamf server.
- Click the gear icon in the upper right and then click Server Infrastructure in the left pane.
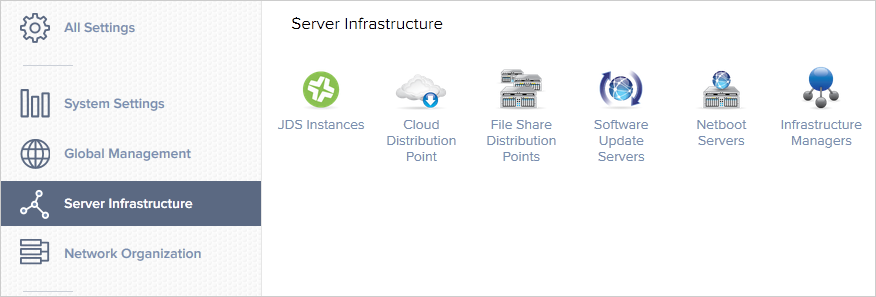
- Jamf Pro supports cloud-based (content delivery networks) and file share distribution points. Depending on what is available to you, click the Cloud Distribution Point or the File Share Distribution Points icon. The instructions below are for setting up a file share distribution point. If you would like to set up a cloud distribution point, please consult Jamf Pro documentation for details.
- After you click the File Share Distribution Point icon, click New.
- On the General tab page:
- Type a name for the distribution point.
- Specify the IP address or the host name of the distribution point server.
- Select the Use as master distribution point option.
- Click the File Sharing tab and specify the following:
- Protocol: Select AFP or SMB depending on which protocol is used on your server for file sharing.
- Share name: Specify the share name. For example, if your server name is MYSERVER and your full share name is \\MYSERVER\JAMF-SHARE, specify JAMF-SHARE in this field.
- Port: In most cases the default value is what a given protocol normally uses. If you know that your server uses a different port number, specify it here.
- Read/Write Account: Specify credentials of an account that has read/write access to the share.
- Read-Only Account: Specify credentials of an account that has read-only access to the share.
- If your server supports HTTP downloads, select the HTTP/HTTPS tab and then select the Use HTTP downloads option. Based on our own and other users' experience, HTTP/HTTPS-enabled distribution points are more reliable than AFP/SMB shares, but you can try both options and see which one works better for you.
- Click Save to save the settings and add the distribution point to your Jamf Pro installation.
Add the deployment package to the distribution point
To add the deployment package to the distribution point:
- Open the Jamf Admin app on a Mac and login to your Jamf Pro server.
- Drag the Parallels Desktop deployment package to the main repository area (the middle area in the right pane).
- The package will be uploaded to the master distribution point and will appear in Jamf Admin as a zip archive, as shown on the screenshot below.
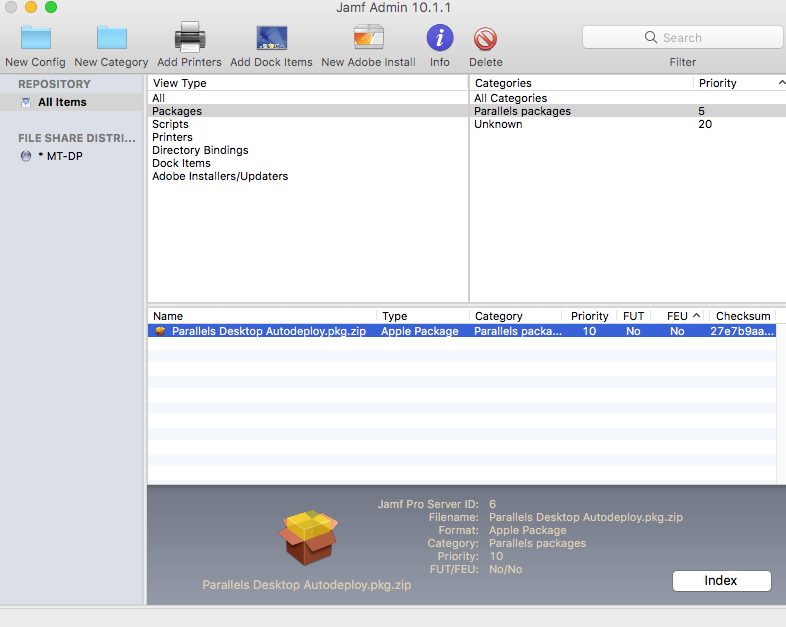
Don't be alarmed about the .zip extension. Jamf Admin compresses non-flat PKGs in order to make their size smaller. When deployed, the archive is automatically unzipped on a target Mac and the package is executed normally.
- You can set other options if needed, such as add a package to a category or change the package priority. Indexing the package is not necessary for the purpose of deploying it on Macs.
- Close the Jamf Admin when done.
To verify that the package has been added to the distribution point:
- Open the Jamf Pro console and login to Jamf Pro server.
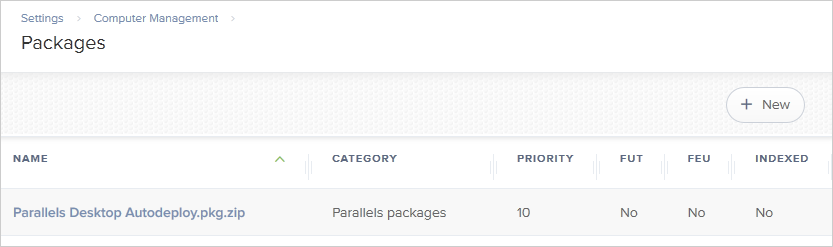
- Click the gear icon in the upper right and select Computer Management in the left pane.
- Click Packages in the right pane. You should see the Parallels Desktop Autodeploy.pkg.zip package in the list.
- If needed, you can modify the package display name and other settings. To do so, click the package and then click the Edit button in the lower right. Modify any of the settings as you require (except the file name). All settings are optional. If not sure, simply leave them unchanged.
Install the package
You can install the package on Mac computers using a policy or you can use the Jamf Remote app that works similar to Apple Remote Desktop. This section contains instructions on how to install a package using a policy. For Jamf Remote instructions, please refer to the Jamf Pro documentation.
Create a policy
To create a policy:
- In the Jamf Pro console, click the Computers tab in the left pane and then click Policies.
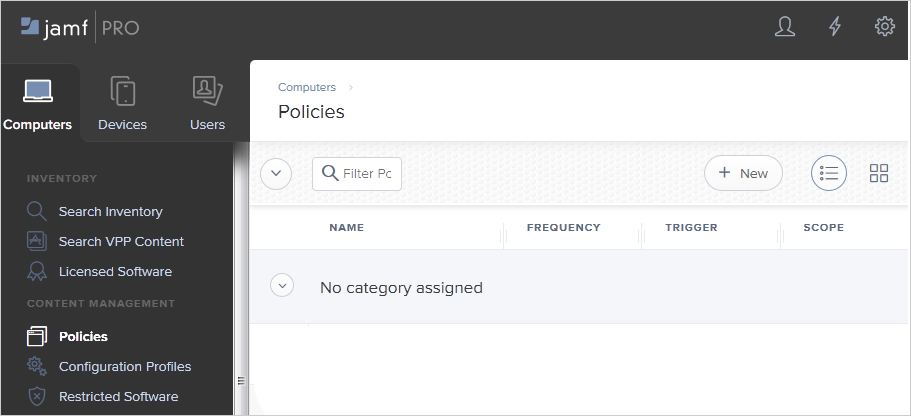
- In the right pane, click New. The New Policy pane loads where you can define the policy.
- In the General payload, specify the following:
- Type a name for the policy.
- Select the Enabled option.
- Specify a category (optional).
- In the Trigger section, select one or more events that should trigger the policy retrieval on target Mac computers.
- In the Execution Frequency drop-down list, select a frequency at which to run the policy. Since Parallels Desktop has to be installed just once, you may select Once per computer or Once per user (to install Parallels Desktop for each user if a Mac has more than one).
- The Target Drive option allows you to specify the drive on which to run the policy. You would normally use the default option, which will run the policy on the boot drive.
- Other options in the General payload allow you to configure limitations on when the policy can and cannot run. This includes server-side and client-side limitations. You can specify them according to your needs or you can leave them blank.
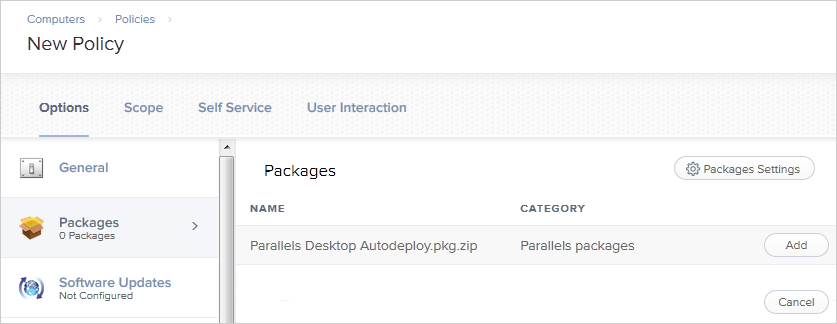
- To specify a package for the policy, click the Packages payload and then click the Configure button in the right pane.The pane will be populated with the list of available packages.
- Locate the Parallels Desktop Autodeploy.pkg.zip package and click Add.
- Select a distribution point that contains the Parallels Desktop package. If you select the Specific file share distribution point option, choose the distribution point. If the distribution point is both an AFP/SMB and HTTP share, Jamf will try to use the HTTP option to download the package to target Macs. If needed, you can force it to use the AFP/SMB share by selecting the Force file sharing over AFP/SMB option. Based on our observations, HTTP shares work more reliably in Jamf, but you can try different options if you are experiencing issues with mounting shares on Mac computers during the policy execution.
- In the Action drop-down list, select how the package should be downloaded and installed on Mac computers:
- Install — when the policy runs, the package is downloaded and installed on a Mac computer as a single operation. Note that if you have a large number of Macs and the policy runs on all of them simultaneously, all of them will try to download the policy at the same time. For this reason, you may consider the options below to avoid overloading your network.
- Cache — when the policy runs, the package is downloaded to a Mac computer but is not installed at that time.
- Install Cached — a policy with this action installs the package that has been downloaded previously using the Cache option. You can use this and the "Cache" options if you are deploying Parallels Desktop on a large number of Macs. First, you "cache" the deployment package on each Mac at a convenient time. Once that's done, you run the "Install Cached" policy to install the package, which will be a completely local operation for each Mac. This way, you can ensure that Parallels Desktop is deployed on each Mac at roughly the same time (e.g. on the weekend) without delays.
- The rest of the payloads are not required for Parallels Desktop package deployment.
- To specify target Mac computers, click the Scope tab at the top of the pane. You can specify targets by computer name or user name (or both).You can also set limitations and exclusions to further narrow down the target list.
- If you would like the package to appear in the Self Service app on a Mac, click the Self Service tab, select the Make the policy available in Self Service option, and specify additional options if needed. The Self Service app allows the user to initiate the policy retrieval manually without waiting for it to trigger.
- The User Interaction tab page allows you to specify messages that will be displayed to a Mac user when the policy runs on their Macs. If you want the installation to be completely silent, you can skip this page.
- When done, click Save to save the policy.
Deploy the package
Once the policy is retrieved by a Mac computer, it will install and activate Parallels Desktop on it. Once completed, the Mac user can begin using Parallels Desktop immediately.
If you are testing your policy, you can wait for it to trigger or you can run it manually using the Self Service app on a Mac. The app is installed when a Mac is enrolled in Jamf Pro and can be opened from the Applications folder in macOS. If there errors executing the policy, you can review them in the app. Please also note that when testing a policy, don't try to run it on the same Mac that you use as a distribution point because an attempt to mount a share on the same Mac that hosts it will fail.
 Feedback Feedback |