|
|
|
|
Add a Virtual Machine
To add a virtual machine to the deployment package, simply copy the virtual machine file to the Virtual Machine(s) folder. You can add a regular (.pvm) or archived (.pvmz) virtual machine. See the Note below for details. More than one virtual machine can be added to the deployment package if needed.
Note: To decrease network load during mass deployment, it is recommended to archive a virtual machine before adding it to the deployment package. Archiving must be done in Parallels Desktop by right-clicking a virtual machine in Control Center and clicking Archive, which will compress the virtual machine file and give it the ".pvmz" extension. Please note that other archives (like .zip), are not supported and must not be used. When a package is deployed on a Mac computer, the archived virtual machine will be automatically unarchived to the standard ".pvm" format.
Before adding a virtual machine to the deployment package, you can configure it according to your needs. The subsections that follow this one describe the modifications that you can make to the virtual machine configuration.
Please note that the virtual machine must be fully stopped before adding it to the deployment package (it cannot be paused or suspended). This is necessary because deployment configuration options are applied to a virtual machine on a target Mac and this can only be done if the virtual machine is stopped.
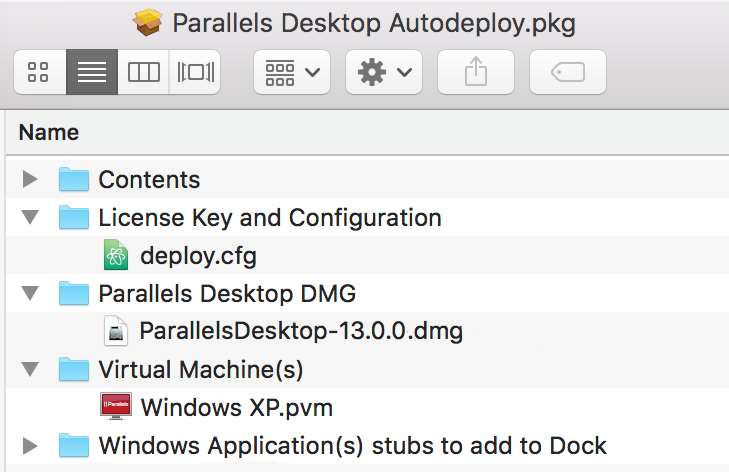
After you add a virtual machine to the deployment package, the package folders should look like the following:
Read on to learn about modifications that you can make to the virtual machine configuration before adding it to the deployment package. If you are not planning on configuring a virtual machine at this time, you can skip to the Adding Windows Application Stubs section.
 Feedback Feedback |