|
|
Using an External Storage Device
Important: After importing your data, you may need to reactivate some of your Windows programs using the activation keys you received when you purchased the programs.
To import your data from a PC using an external storage device:
- Connect an external storage device to your Windows PC.
- On the Windows PC, open Parallels Transporter Agent by clicking the Start menu and choosing All Programs > Parallels > Parallels Transporter Agent .
- Select External storage and click Continue . Parallels Transporter Agent collects information about the Windows PC.
- If you want to log in to Windows automatically whenever you start up Windows, select Enable Automatic Logon and specify the Administrator's password. When ready, click Continue .
-
Choose what you want to transfer;
- System only : this option allows you to transfer the operating system and applications only. If you choose it, go to step 7.
- System and documents : this option allows you to transfer the operating system, applications, and user's files like pictures, documents, downloads, music, videos, etc.
-
If you chose to transfer system and documents in the previous step, choose how you want to transfer the user's files:
- Transfer to Windows : If you choose this option, the user's files will be transferred to the resulting virtual machine and will not be accessible from OS X. You can make them accessible from OS X later by sharing Windows with OS X.
-
Transfer to Mac
: If you choose this option, the user's files will be transferred to the corresponding folders in OS X. The resulting virtual machine will have access to these files as well because it will be configured to share folders with OS X.
This way of transferring the user's files requires additional steps with Apple Migration Assistant. Follow the link in the screen for more information.
-
Choose where you want to store your data. You can also click
Customize
and select which Windows volumes to migrate.
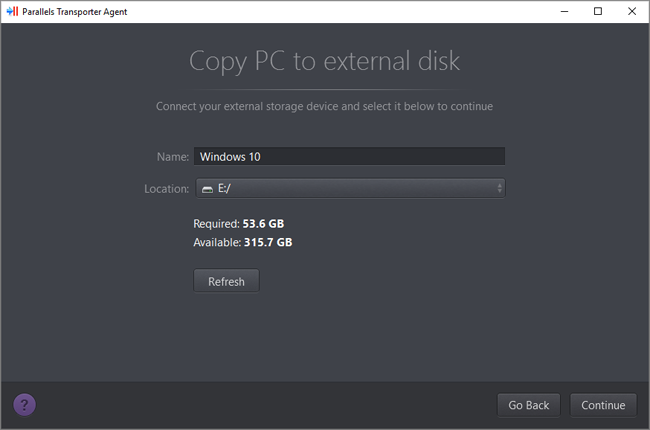
When ready, click Continue .
- In the next step there's a warning about Windows activation that might be required when you start using it. To proceed, read this message, select I want to continue and click Continue .
- Once the migration is complete, click Done to quit Parallels Transporter Agent.
- Disconnect the storage device from the Windows PC and connect it to your Mac.
- On your Mac, open Parallels Desktop and choose File > New .
- Select Transfer Windows from a PC and click Continue .
- Select External storage and click Continue .
- Parallels Desktop scans the connected storages for the newly created virtual machine. If Parallels Desktop cannot find it, select the virtual machine manually. Then click Continue .
- Choose where you want to install Windows and your data, and then click Continue .
- Once the transfer is complete, click Done .
- Start Windows.
- When Windows boots up, choose Actions > Install Parallels Tools and follow the onscreen instructions.
Note: To be able to install Parallels Tools, you must be logged in to Windows as an administrator.
|
|
|
|
|
 Feedback
|