Install Windows
If you have a Windows installation source (a DVD disc, an image file, or a USB storage device) and a valid Windows product key, you can install Windows on your Mac and use it with Parallels Desktop.
To install Windows:
- Open Parallels Desktop (in the Applications folder) and choose File > New .
-
Prepare your installation media:
- If you're using a Windows installation ISO image file, be sure you have downloaded the file.
- If you have a Windows installation disc, insert it into the DVD drive.
- If you have a USB storage with Windows, connect the storage to the Mac.
- Click Install Windows or another OS from a DVD or image file .
-
Parallels Desktop scans for and lists installable operating systems. If you see the version of Windows you want to install, select it, click
Continue
and go to step 5.
If the Windows installation source doesn't show up automatically, click Choose Manually to browse for it manually. You can browse from the following sources:
- Image File: If you have a Windows image file, click Image File and drag the image to the Parallels Wizard window. Once Windows is detected, click Continue .
- DVD: If you have a Windows DVD, insert it into the DVD drive. Once Windows is detected, click Continue . If your Mac doesn't have a DVD drive, you can use an Apple SuperDrive, another Mac's DVD drive via Remote Disc, or make an image from the disc.
-
USB Drive:
If you have a bootable USB installer with Windows, click
USB Drive
and connect the drive to the Mac. You'll be prompted to grant access to the drive. Then, once Windows is detected, click
Continue
.
Note: Parallels Desktop may fail to detect some operating systems (for example, the latest Linux distributions). If this happens but you're sure that the operating system can be installed, click Continue , specify the OS type manually (if it's not listed, choose Other ), and follow the onscreen instructions.
-
Be sure to leave
Express installation
selected.
Note: If you deselect Express installation , be sure to stay near your computer to follow onscreen instructions during the installation. Also, you'll need to install Parallels Tools after the installation to allow the most seamless operation between Windows and macOS.
- Choose what you're going to primarily use Windows for. Parallels Desktop settings will be tuned to best fit your needs.
- Choose where you want to store Windows from the Location menu.
- If you want to pre-set things like how much memory Windows uses or whether it starts automatically when you open Parallels Desktop, select Customize settings before installation . You can also adjust these settings after the operating system is installed.
-
Click
Continue
.
The assistant installs Windows.
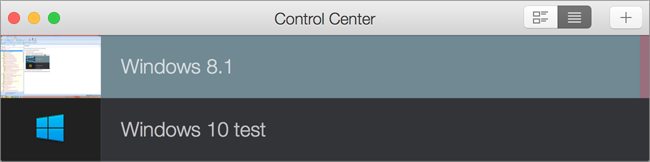
Once Windows is installed, you can start it up by clicking the power button in Control Center .
Important: The first time you start Windows, Parallels Tools are installed to allow seamless operation between Windows and macOS. Once Parallels Tools are installed, you're prompted to restart Windows.
If you didn't select Express installation in step 5 above, you must install Parallels Tools manually .
When you install Windows, Parallels Desktop creates an administrator account with a blank password. Once the installation is complete, it is recommended that you change the password.
|
|