|
|
|
|
Using RADIUS
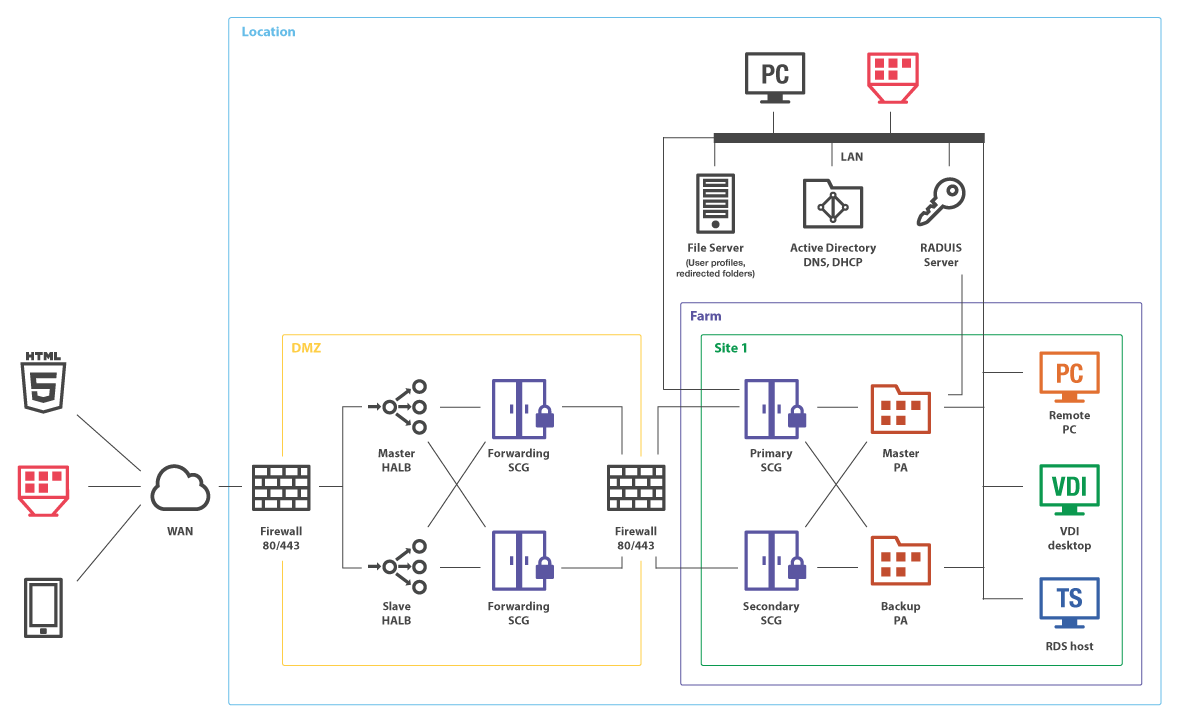
The below diagram shows a typical Parallels Remote Application Server scenario with Parallels Publishing agent connected to a Radius server.
To configure Radius properties:
- In the Parallels RAS Console, navigate to the Connection > Second Level Authentication tab.
- In the Provider drop-down list, select Radius .
- Click the Settings button. The Radius Properties dialog opens.
- In the Server field, enter the hostname or IP address of the Radius Server.
- In the Port field, enter the port number for the Radius Server.
- In the Timeout field, specify the packet timeout in seconds.
- In the Retries field, specify the number of retries when attempting to establish a connection.
- Type the Secret Key and specify the Password Encoding , either PAP (Password Authentication Protocol) or CHAP (Challenge Handshake Authentication Protocol), according to the setting specified on the Radius Server.
- Click OK when done.
- Click the Check connection button to validate the connection. If the connection is configured correctly, you will see a confirmation message.
- If your Radius vendor requires specific attributes, click the Attribute tab and then select Add .
- In the Vendor drop-down list, select the vendor.
- In the Attribute list, select the vendor attribute.
- In the Value field, enter the value for the selected attribute type (numeric, string, IP address, date, etc).
|
|
 Feedback
|