Hard Disk
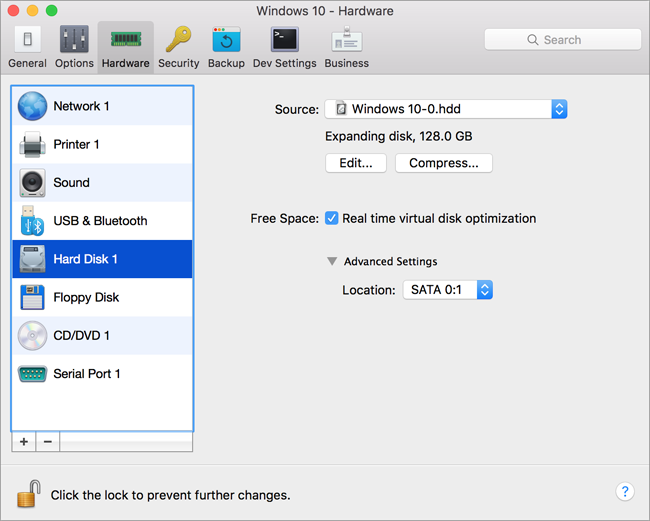
To view and configure the virtual hard disk settings, use the
Hard Disk
pane of Virtual Machine Configuration. Parallels Desktop allows virtual machines to use hard disk images in the
.hdd
format and Windows Boot Camp partitions.
Note: You can connect up to 4 IDE devices (hard disks or CD/DVD drives), 6 SATA, and 15 SCSI devices to a virtual machine. Each device is listed separately in the Virtual Machine Configuration dialog and has its own number.
To edit the device settings, do the following:
- Shut down the virtual machine.
- Open the Actions menu and choose Configure .
- In the Virtual Machine Configuration dialog, click Hardware and select this device name in the sidebar.
Note: If this device is absent, you can add it to Virtual Machine Configuration. For detailed information on how to add a device, refer to Adding and Removing Devices .
In the
Source
field, the virtual hard disk file (
.hdd)
that emulates the virtual machine hard disk is specified. You can change the hard disk source:
- To use the Boot Camp partition as the virtual machine hard disk, click the Source field and select the Boot Camp partition name from the list.
-
To use a virtual hard disk file as the virtual machine hard disk, click the
Source
field and choose the virtual hard disk file from the list, or click
Choose an image file
and specify the path to the desired image file (
.hdd) on your Mac.
In the Location field, you can specify the type of interface for connecting the device:
- IDE . Using this interface type, you can connect up to 4 virtual devices (hard disks or CD/DVD drives).
- SATA . Using this interface type, you can connect up to 6 virtual devices (hard disks or CD/DVD drives).
- SCSI . Using this interface type, you can connect up to 15 virtual devices (hard disks or CD/DVD drives).
Note 1: The Mac OS X guest OS does not support the SCSI controller. In the latest Linux distributions, the SCSI driver may be not installed. In this case, you should install this driver in your Linux guest OS to be able to use the SCSI controller.
Note 2: The SCSI 7:0 location is not available for selecting, since it is occupied by the SCSI controller itself.
Compressing the Disk
If you use an expanding virtual hard disk in your virtual machine, its image file size on the physical hard disk increases as you add new data to the virtual hard disk. When you delete some data from this virtual hard disk, free unused space appears on the disk, but the amount of space your virtual machine occupies on the hard disk of your Mac does not reduce. To free the unused space back to Mac, click the Compress button. The virtual hard disk will be compressed and the hard disk image file size will be decreased. As a result, there will be more free space on your Mac hard disk.
Note: Compressing can be performed for virtual machines without snapshots and with the Rollback Mode option disabled.
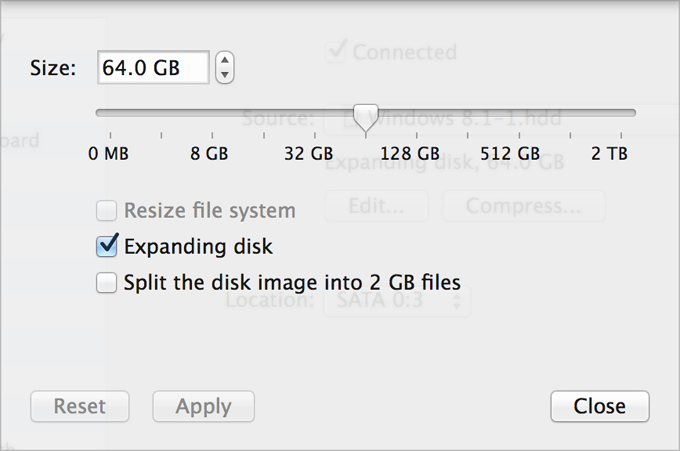
Editing the Disk
If you find that the capacity of your virtual machine hard disk no longer fits your needs, you can change its size.
Important:
1. Resizing a hard disk can be potentially dangerous to your data. Before you start, it is highly recommended that you properly shut down the virtual machine (using the shutdown procedure of its guest operating system) and back up the data. To learn how to make a backup, please see Back Up a Virtual Machine .
2. Resizing may take some time. It is not recommended that you interrupt the process.
3. If your MacBook is running on battery, connect it to a power source or make sure the battery is fully charged. A power outage while writing changes to the disk may cause data loss.
To change the disk size:
-
Click
Edit
.
Note: If your virtual machine is running, has snapshots, or uses a Boot Camp partition as a hard disk, its virtual hard disks cannot be resized.
- Drag the slider or enter a new size in the Size field.
- Select Resize file system if you want to change the file system size:
- If you select Resize file system when increasing the disk size, the additional disk space will be added to the last volume. If you deselect Resize file system , the added space will appear as unallocated space and will be invisible to the guest operating system. To allocate this space, you will have to either create a new partition or expand an existing partition. For instructions on allocating the added space, please refer to the guest OS documentation.
- If you select Resize file system when decreasing the disk size, the disk will be decreased by removing the unallocated space and decreasing the size of the disk partitions. If you deselect Resize file system when decreasing the disk size, you will be able to remove the unallocated space of the disk only and the disk partitions will remain untouched.
If the format of the virtual hard disk is expanding , you can convert it to plain by deselecting Expanding disk .
If you want the virtual hard disk to be split, select Split the disk image into 2 GB files option .
Note: For more information about virtual hard disk types, please refer to Support for Virtual and Real Disks .
Automatically Conserve Disk Space
In most cases, the space that Windows takes up on your hard disk expands as you add files and other data, but isn't reduced when you delete data. To set Parallels Desktop to automatically reduce disk space:
- Select Real time virtual disk optimization .
You can also quickly remove unnecessary files that have built up in the system to free up disk space.
If you want to prevent Virtual Machine Configuration from unauthorized changes, click the Lock icon
![]() at the bottom of the window. The next time someone wants to change the settings in any pane of Virtual Machine Configuration, an administrator's password will be required.
at the bottom of the window. The next time someone wants to change the settings in any pane of Virtual Machine Configuration, an administrator's password will be required.
|
|